Paradigm Shift — A Werewolf Detective StoryA Graphic Novel Series by Dirk I. Tiede2023-07-21T17:30:08Zhttps://paradigmshiftmanga.com/feed/atom/WordPresshttps://dirk-040521.s3-accelerate.amazonaws.com/2020/09/cropped-PS-icon-1-32x32.pngDirk Tiede<![CDATA[From Comics to Film]]>https://paradigmshiftmanga.com/?p=34442023-07-21T17:30:08Z2023-07-21T17:30:08ZWhen I first started Paradigm Shift waaaay back in 1998 (!!), I wanted to see it animated from the very start. Because of this, I made some deliberate choices about storytelling. First, if you couldn’t see it or hear it, I wouldn’t put it on the page. I deliberately thought of the panels a little like storyboards for a movie. In fact, when I’m writing scripts, the story plays out in my mind’s eye a bit like movie. It’s like tuning into my own private TV channel (or streaming service, heh) in my mind. So, in many ways, animation is actually a little closer to what I see in my head than comics.
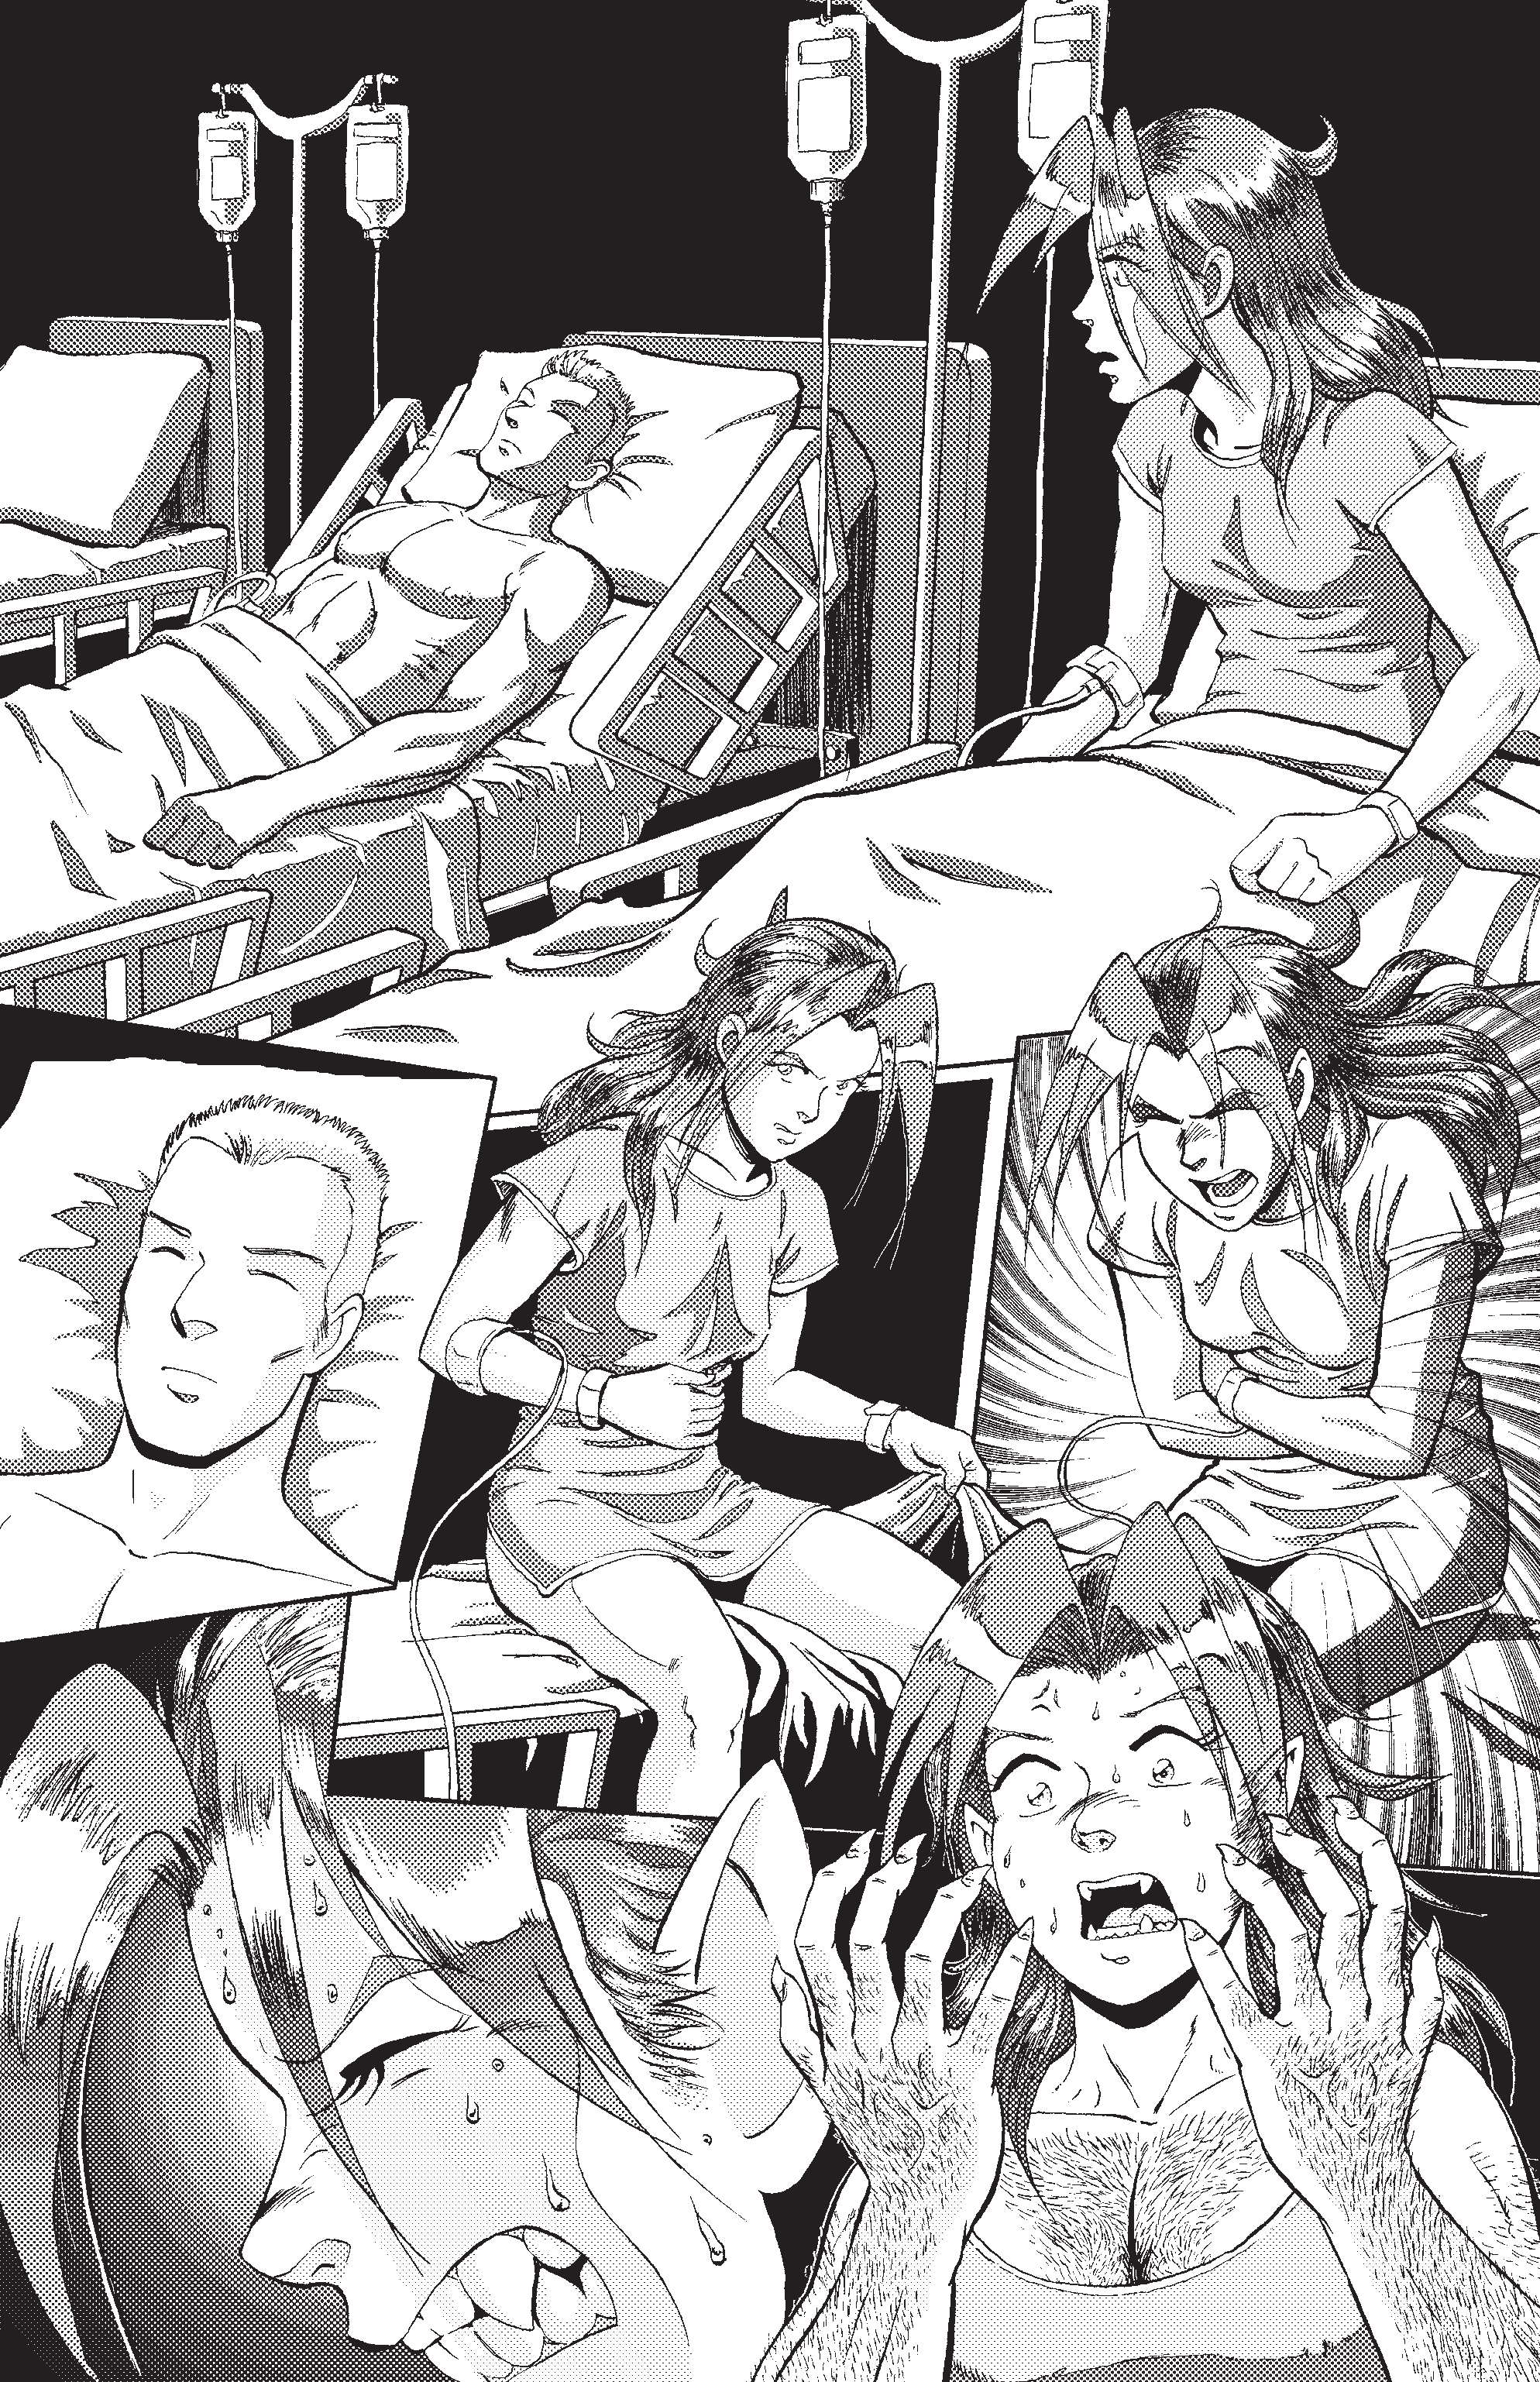
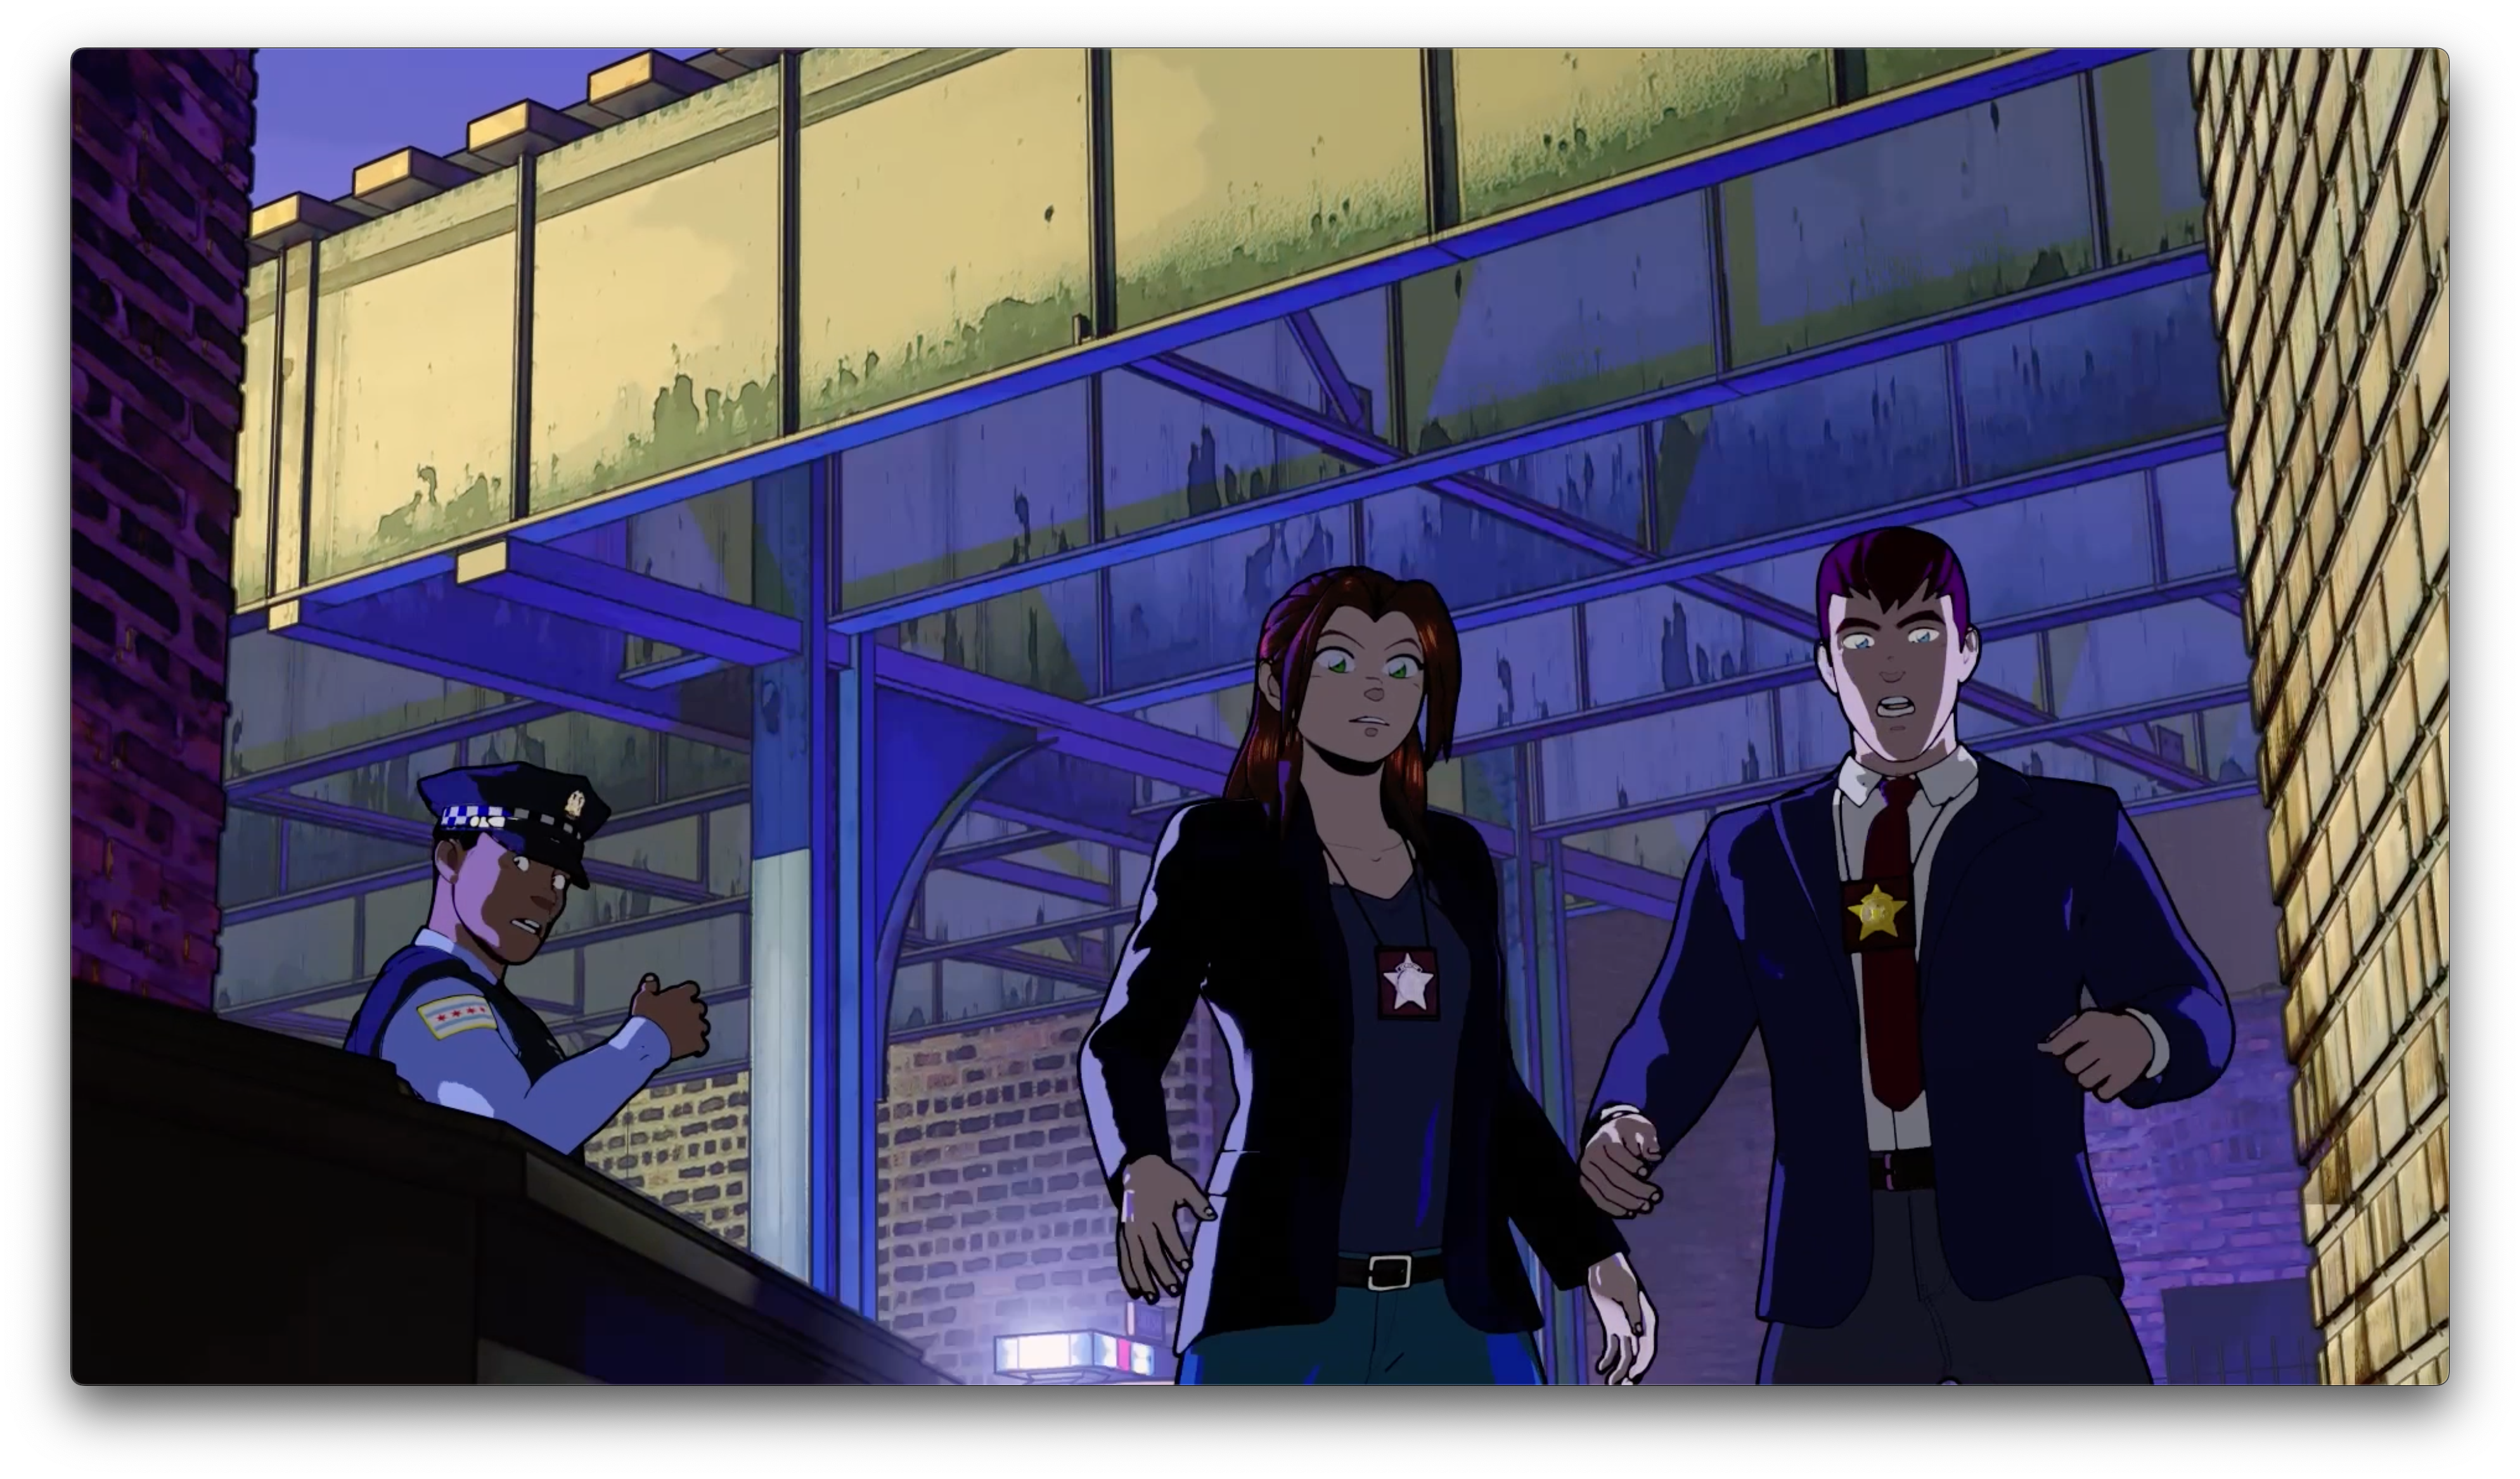
Anyway, I want to share with you some of the key shots and scenes where I directly used the comic as storyboards in RESTLESS SLEEP. It all started with this scene for Part Two: Agitation:
Here’s how it translated to animation:
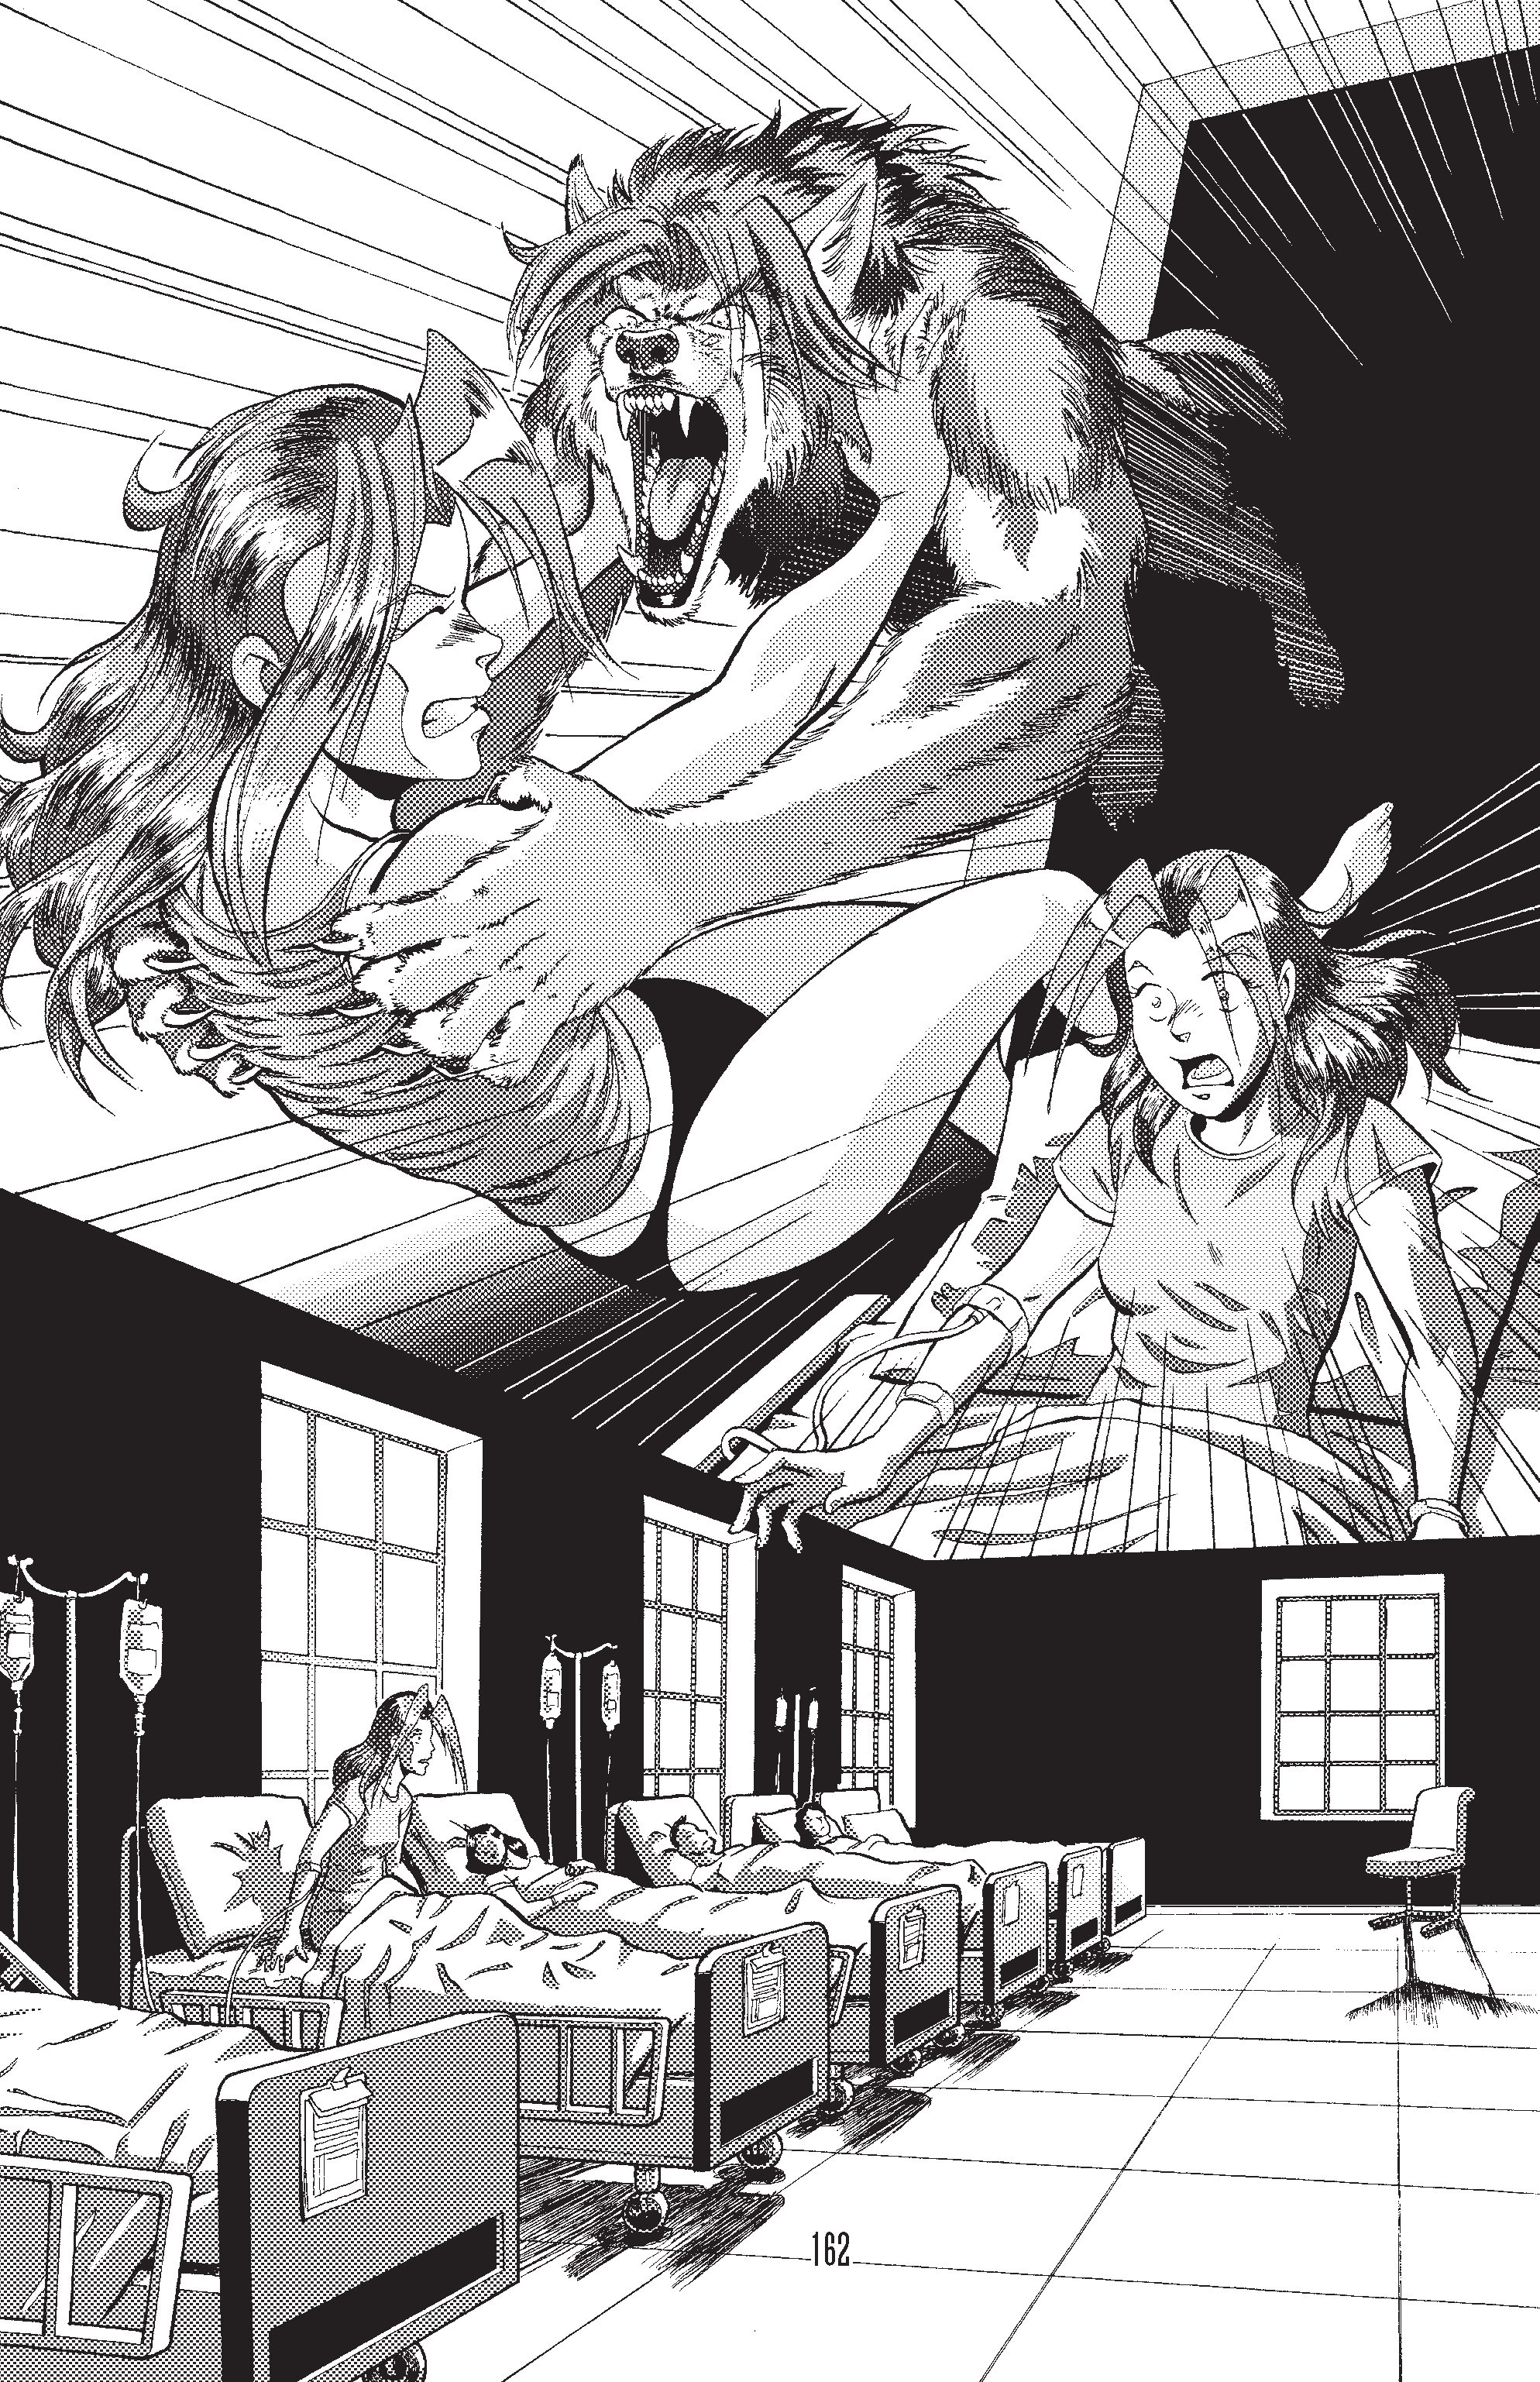
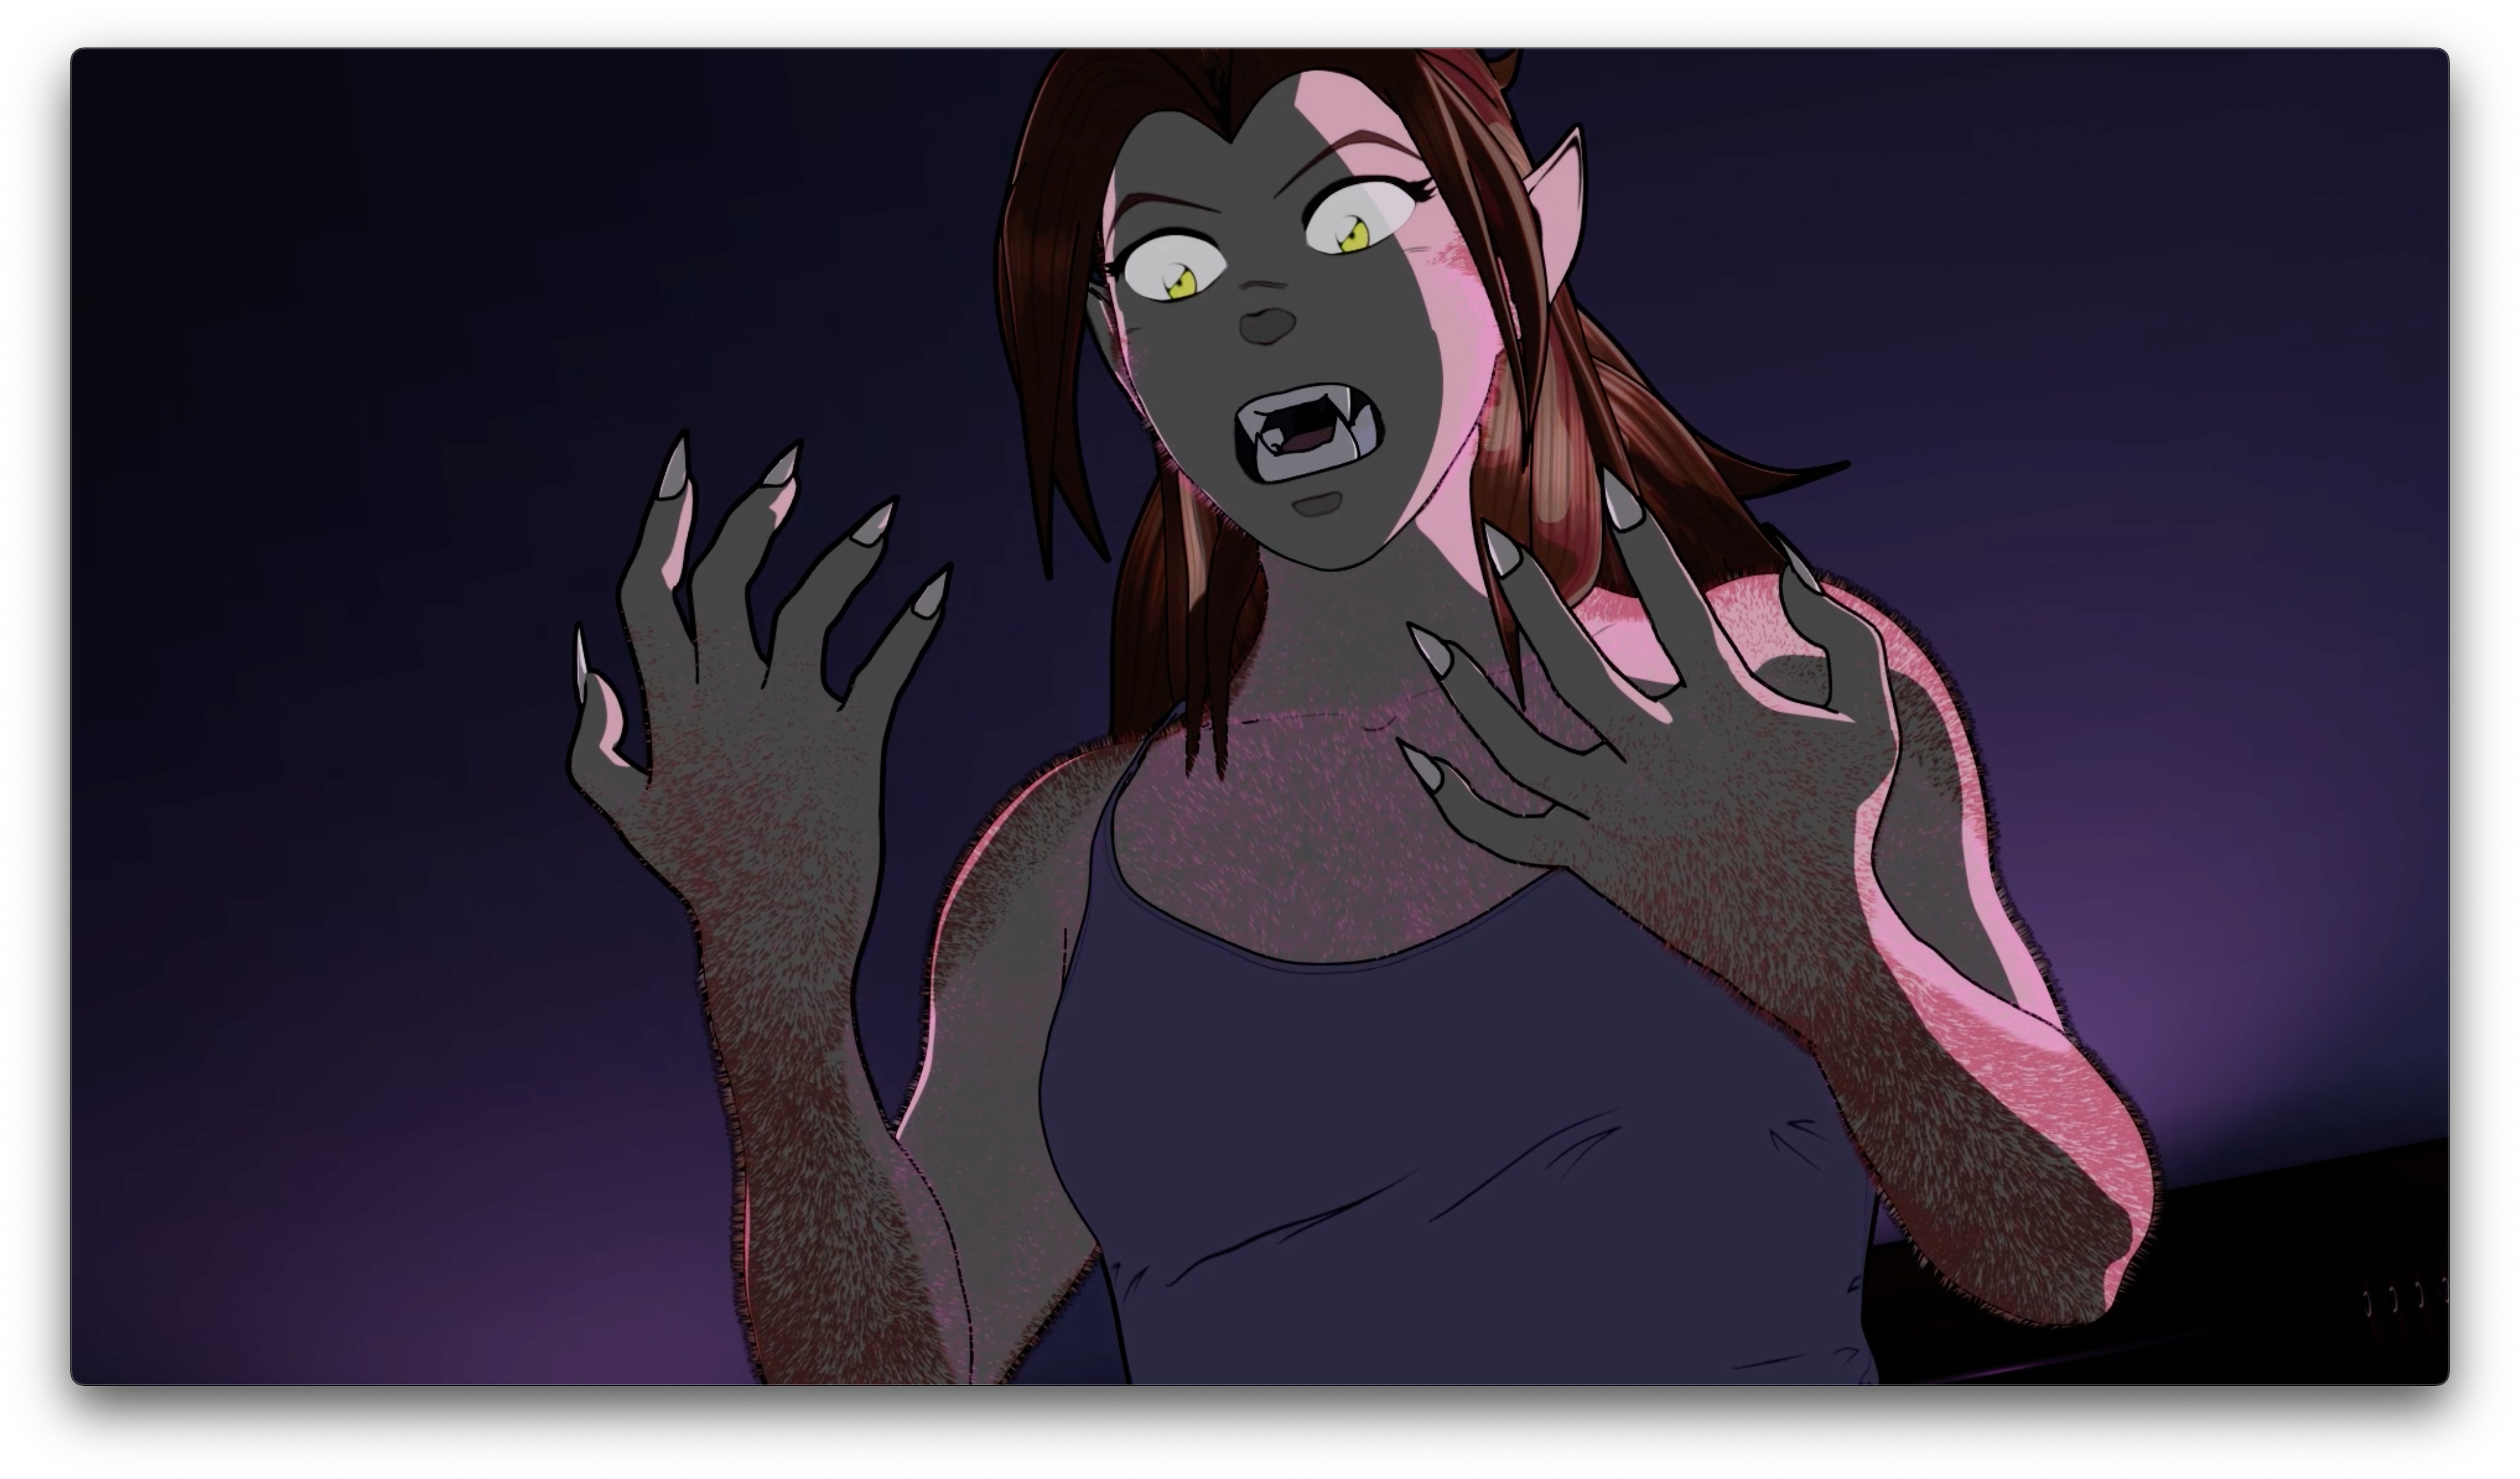
Next, we have the werewolf transformation itself. In the case of the original scene, it starts while she’s having a nightmare about waking up in a hospital, and then the scene shifts back to her bedroom. For the sake of simplicity, I just kept the setting the same in the animated version, but used some of the same basic shots for the film as a starting point.
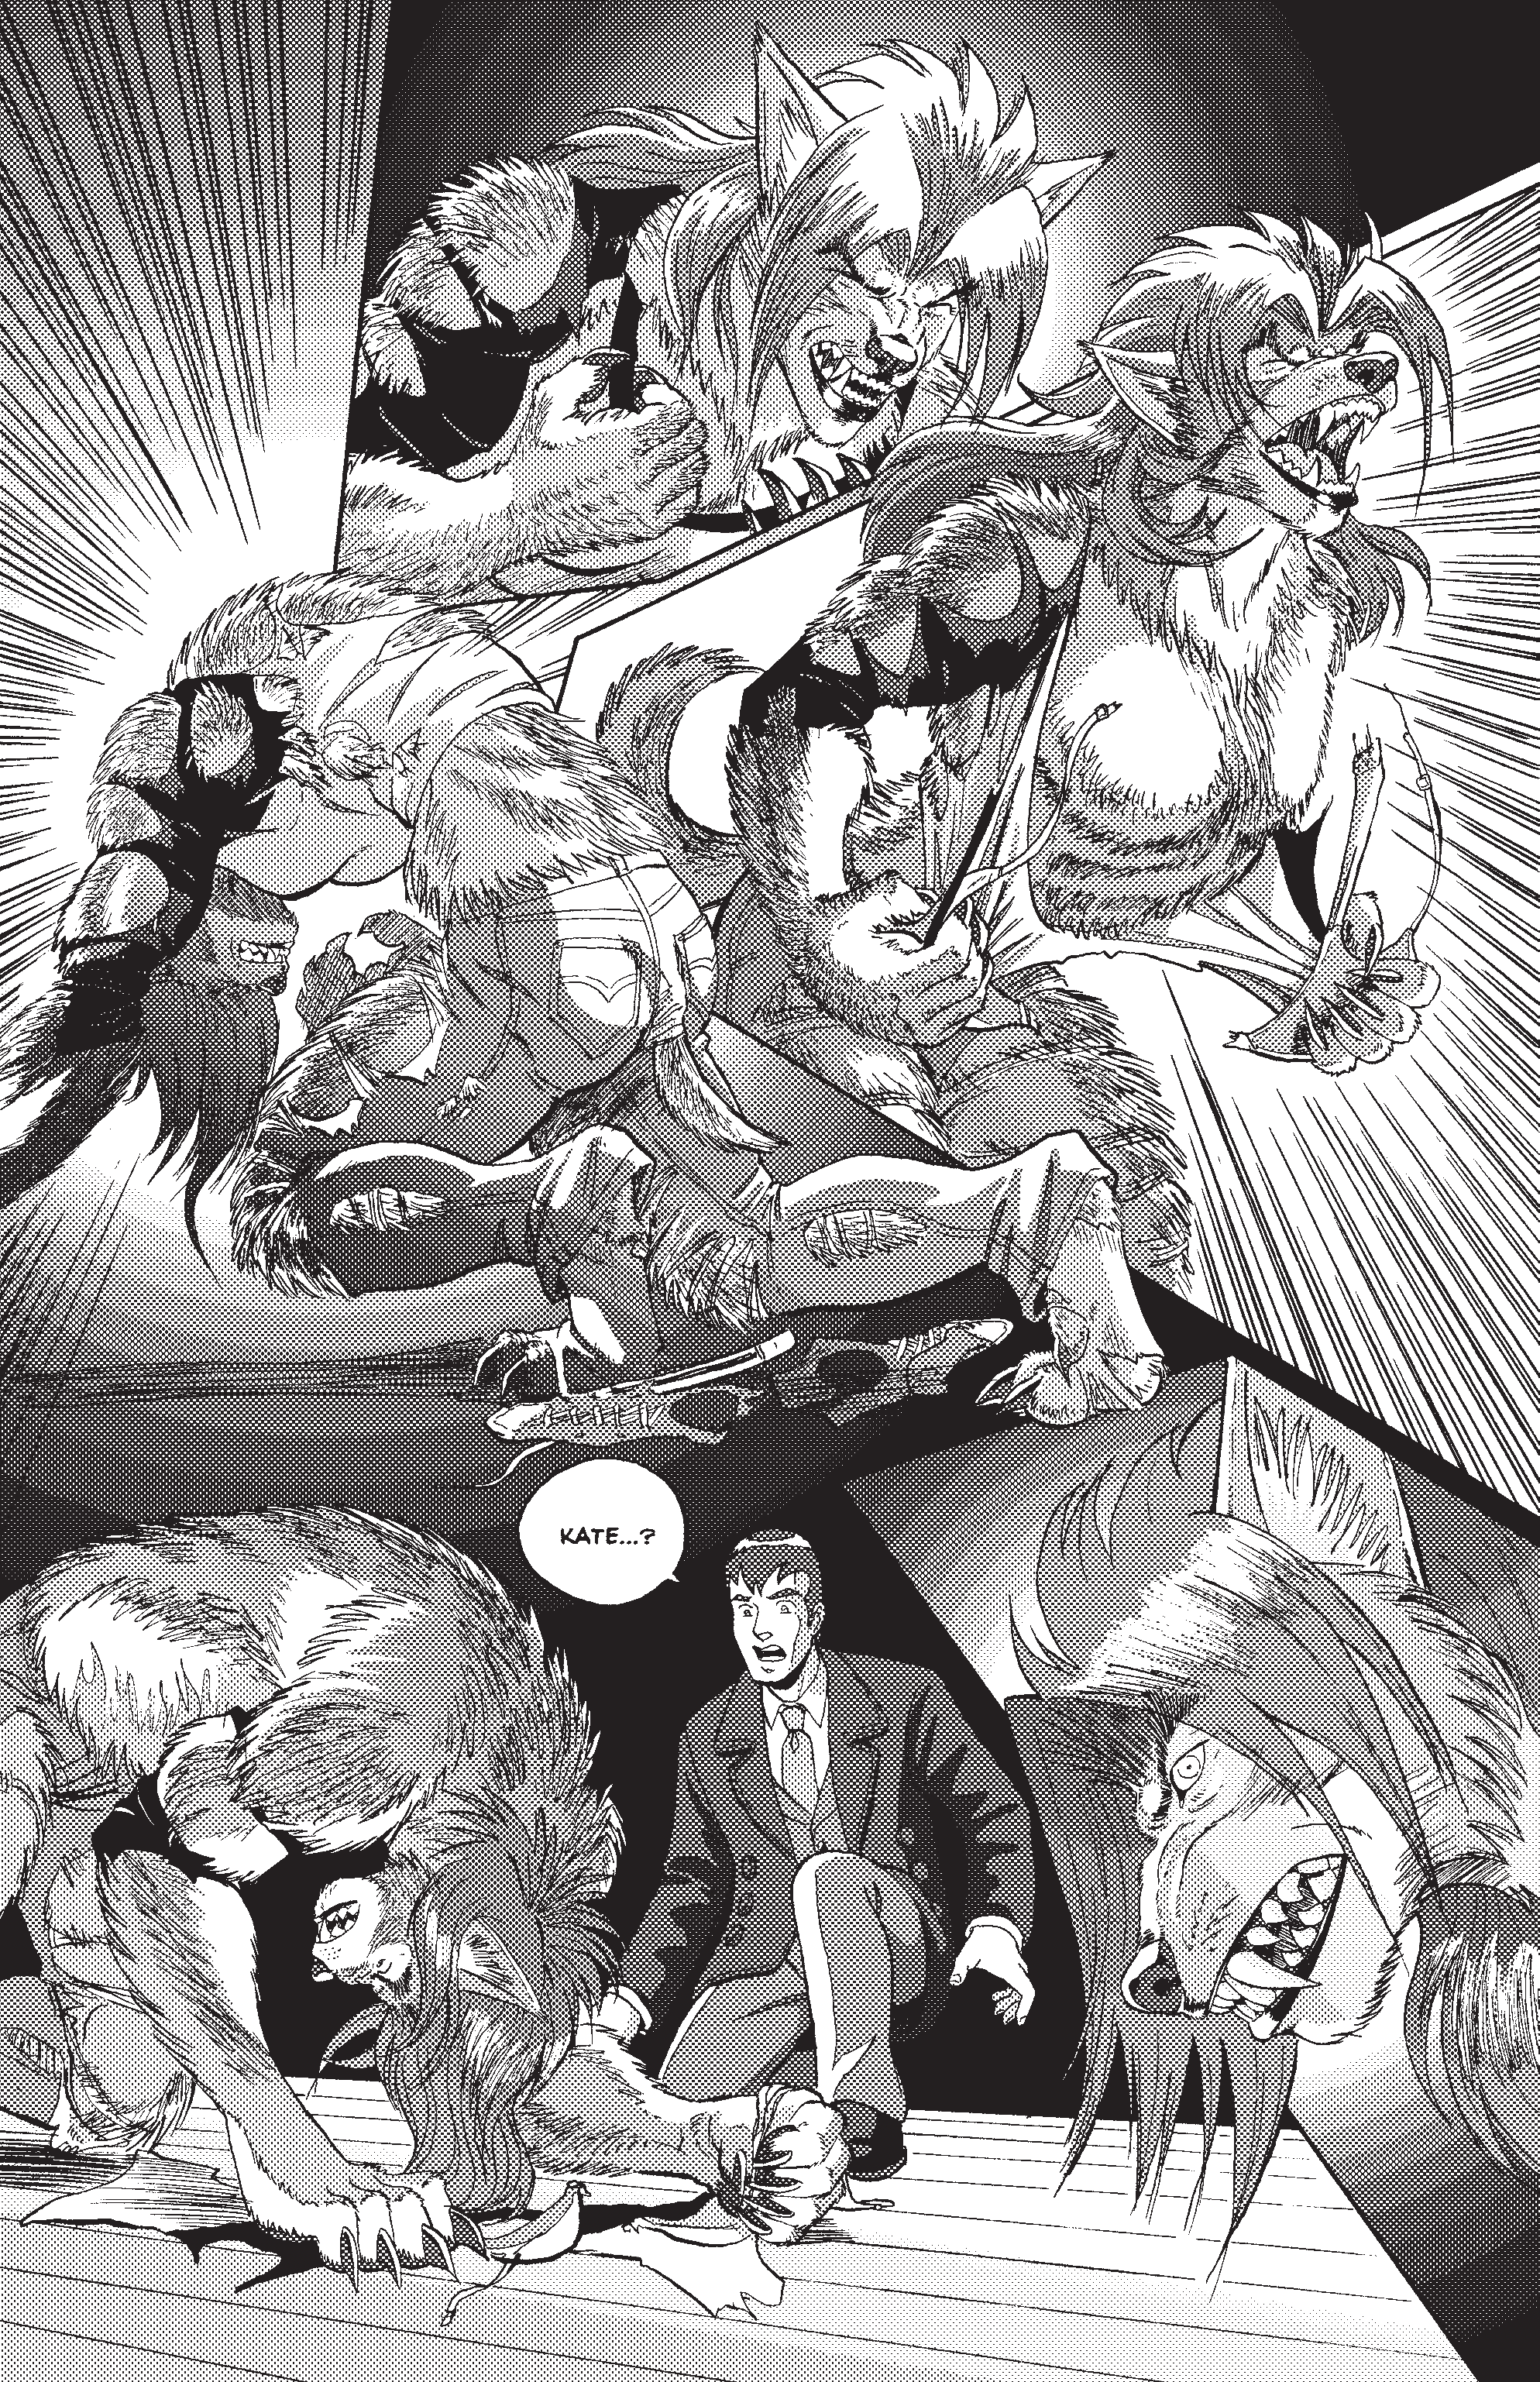
Now, from here we veer off into brand new territory. I added a new of new shots on the fly to complete the rest of the transformation. Here’s how Kate’s full werewolf transformation looks in the film:
However, this scene ends with a shot taken from the last panel from this page in Part Three: Emergence:
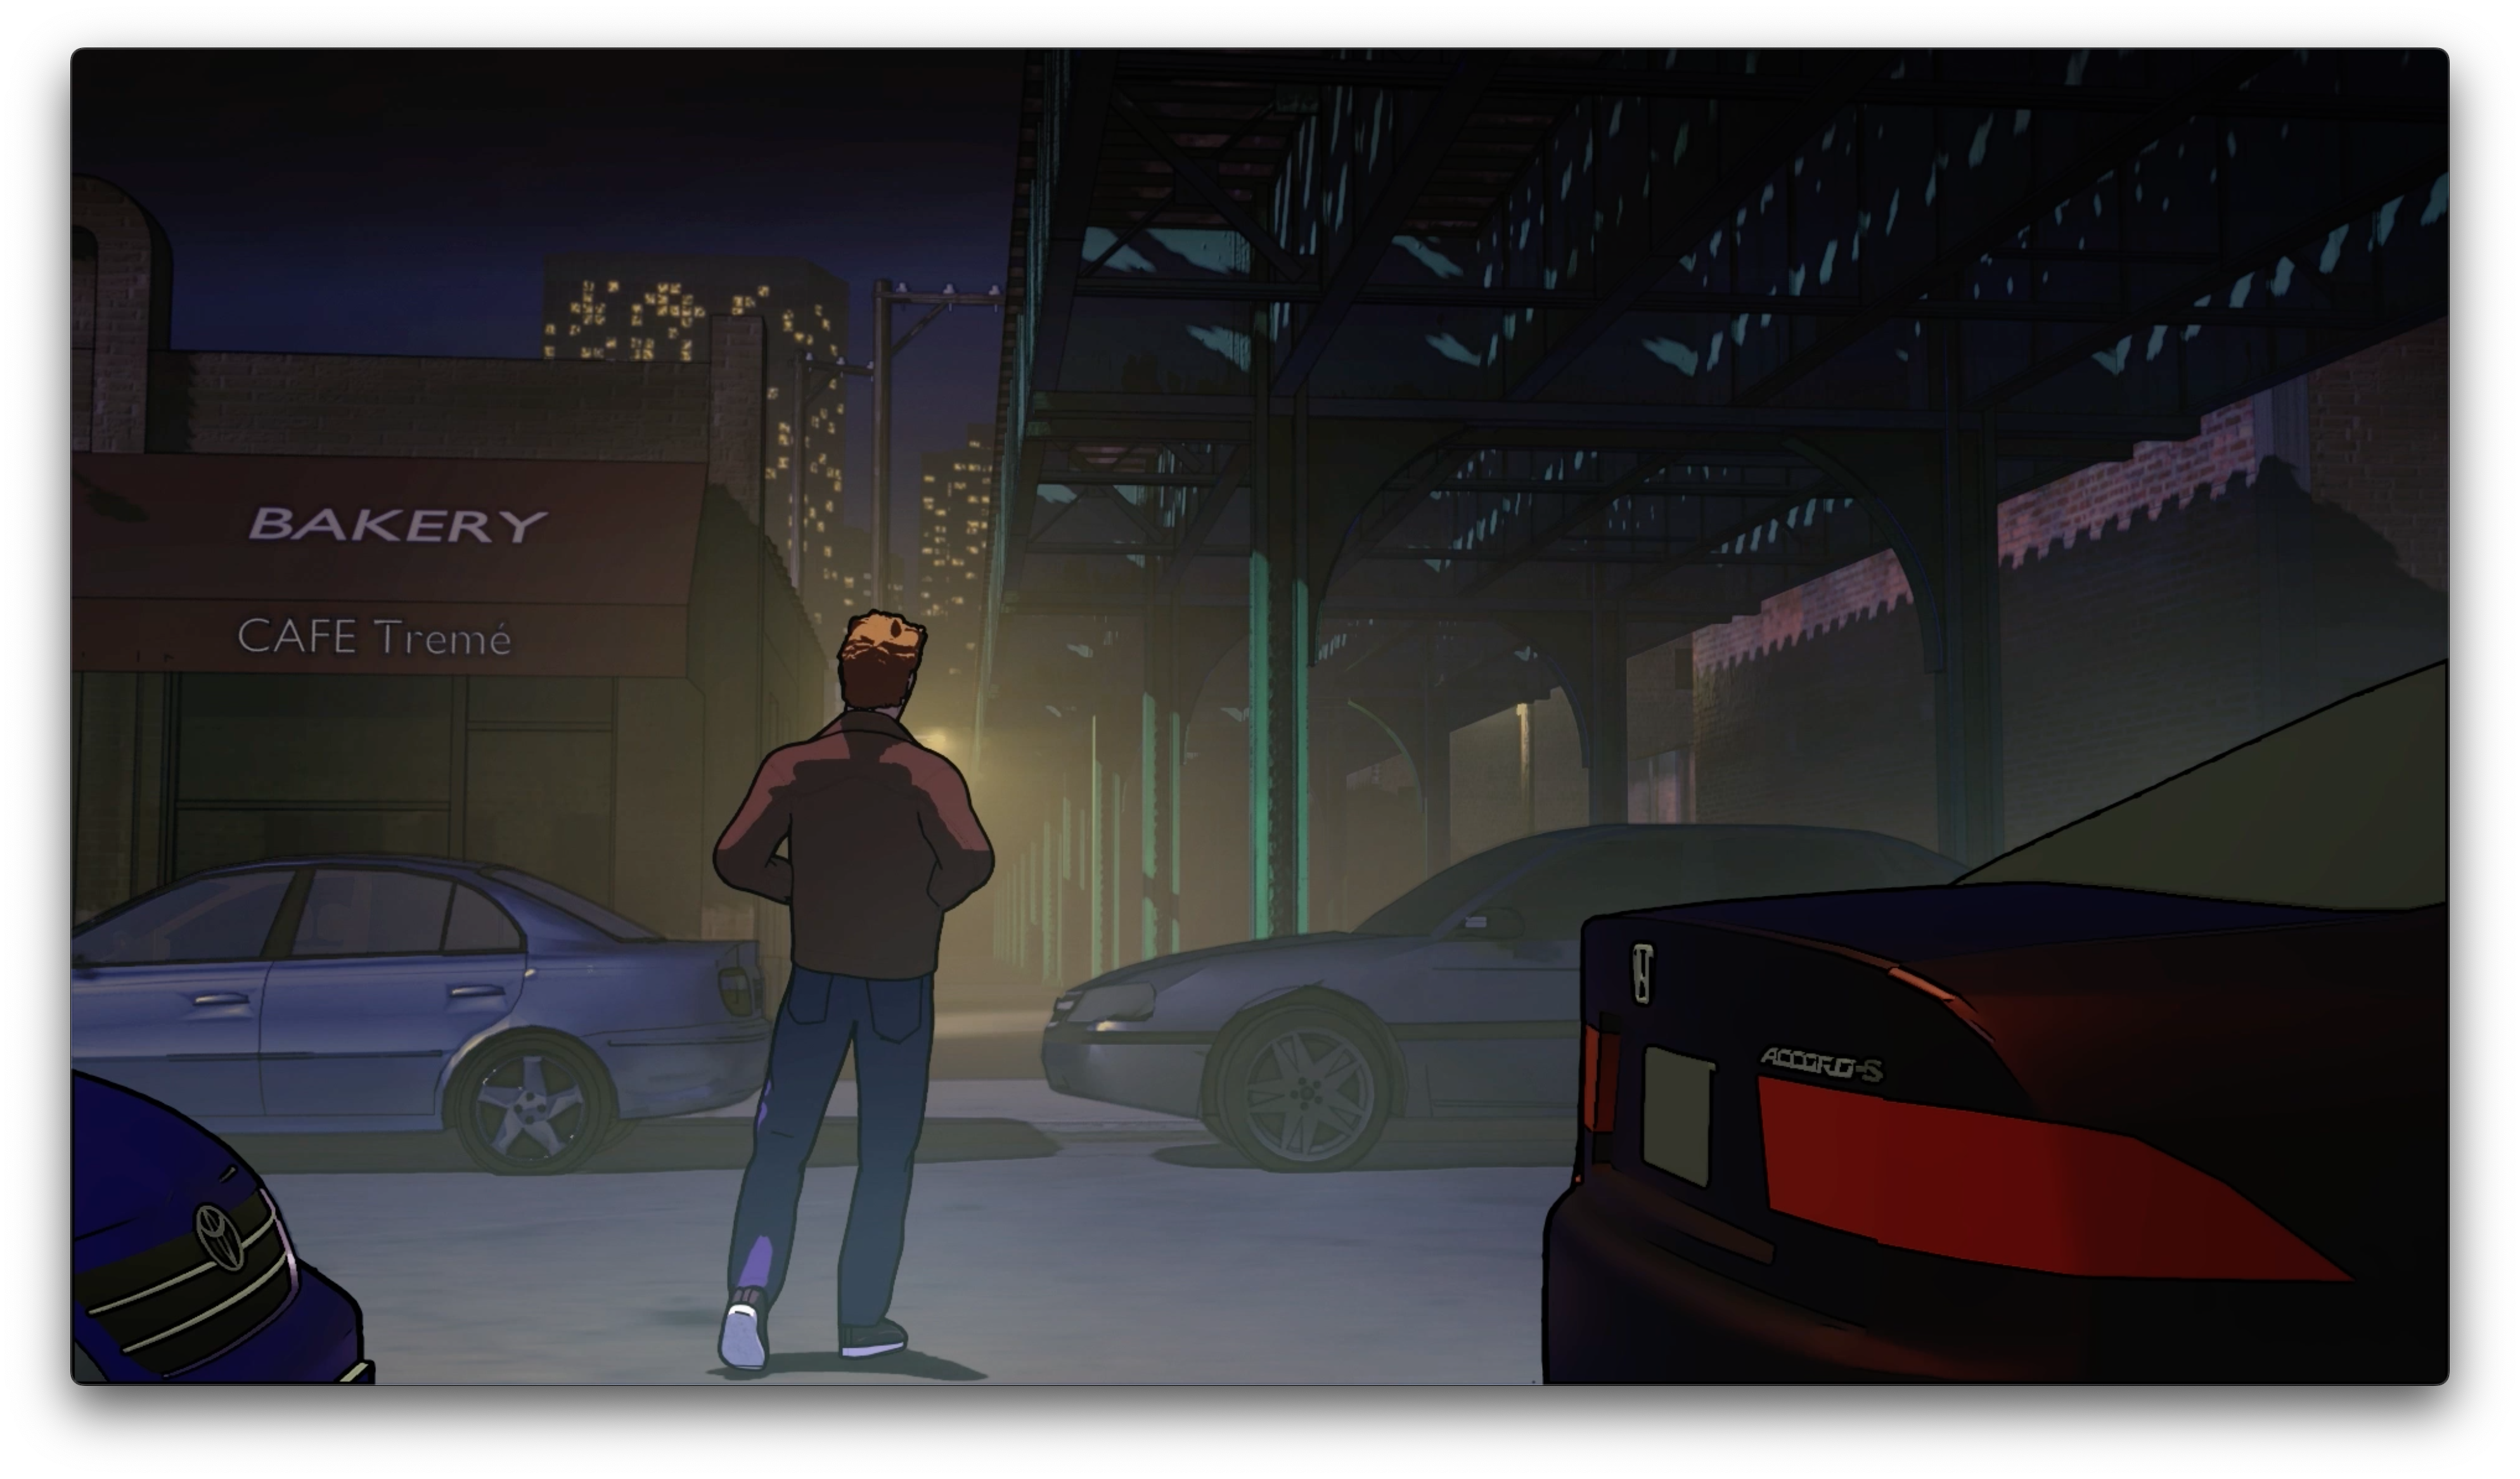
Another scene I wanted to animate from the very start was the X-Files style opening scene where James Wilson meets his untimely demise. Of course, I altered the ending to have it be Kate’s beast instead of Major Bryant’s lion form. Again for simplicity’s sake.
And here’s how it appears in the film:
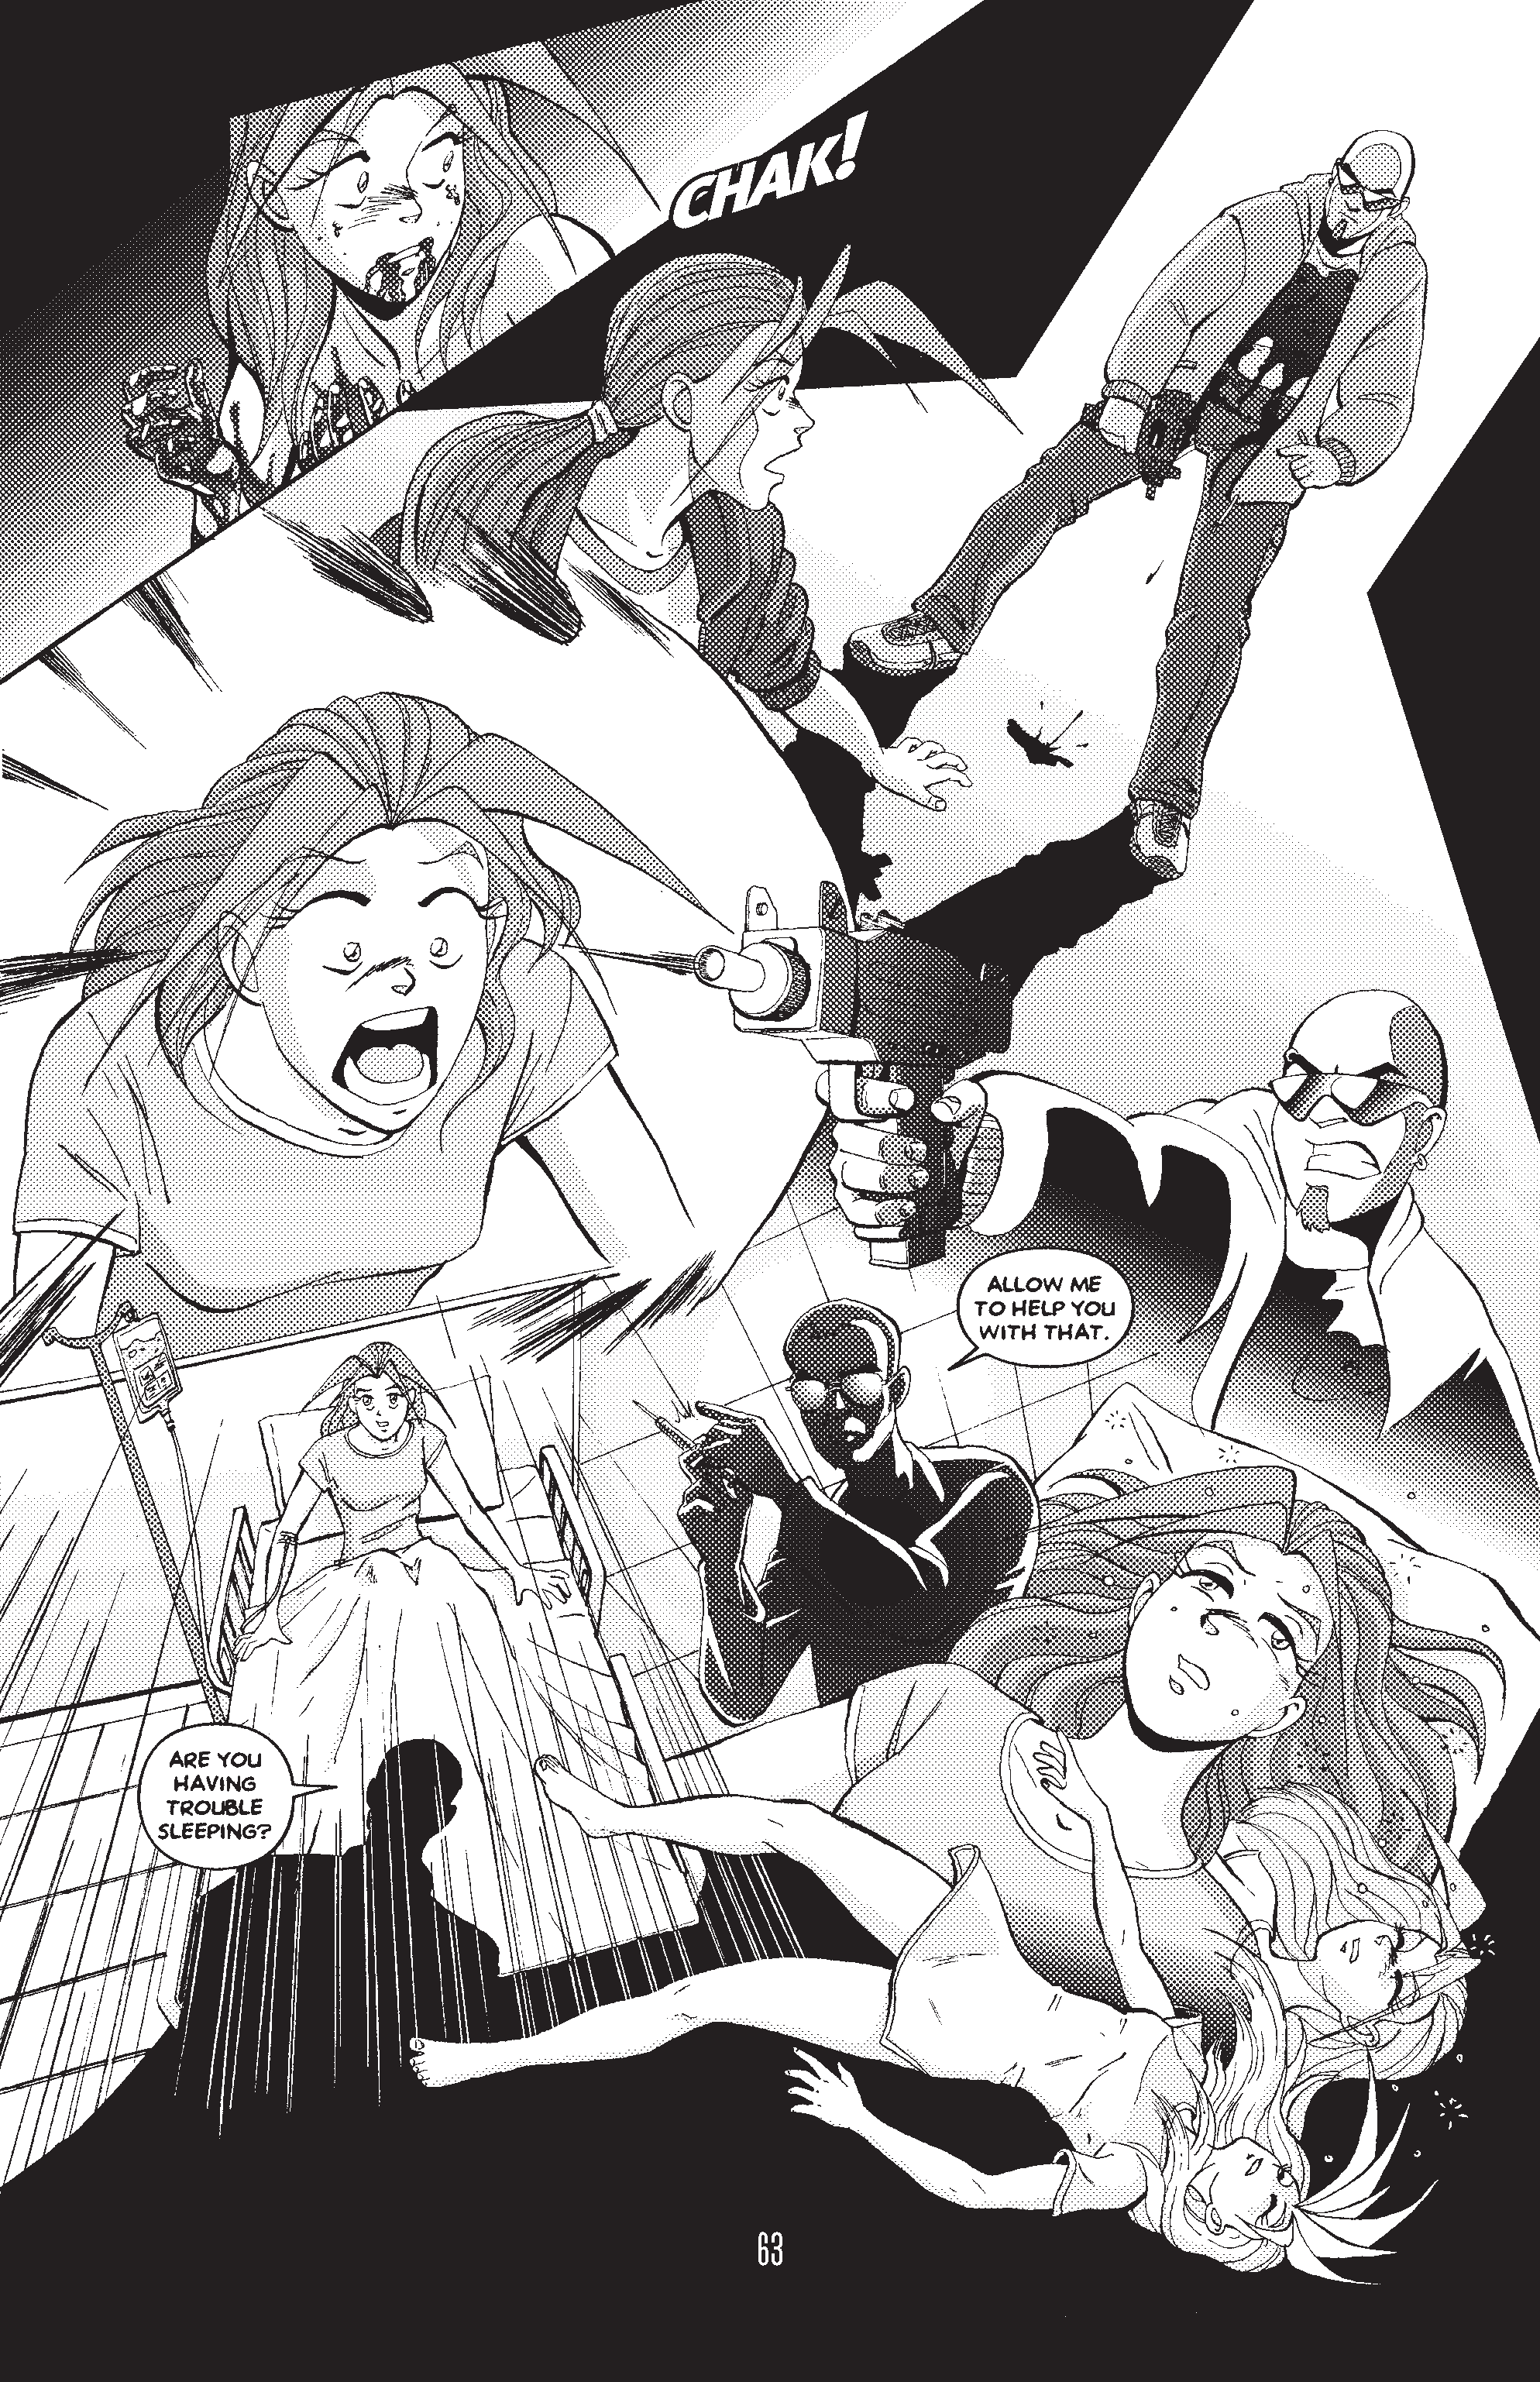
Next, there’s a few shots from Kate’s nightmare at the end of Part One: Equilibrium. Again, I’ve cut out the other elements of the scene, and loop back to theme of her attacking Beast form in her dreams to end the sequence.
And here’s how the nightmare turned out in the film:
The final scene begins with an almost a shot-for-shot interpretation of the final page of Part One: Equilibrium. However, I made one major change where I gave Kate a smartphone, so her conversation with Mike could happen via text. At the time, I had no voice actors lined up, so I used the texting conceit to convey the only dialogue in the film.
Here’s how it plays out in animated form:
I almost used the second part of this scene as the beginning. There’s just a couple of odds and ends shots that I pulled directly from the comic in these. First, we have Kate examining herself in the mirror:
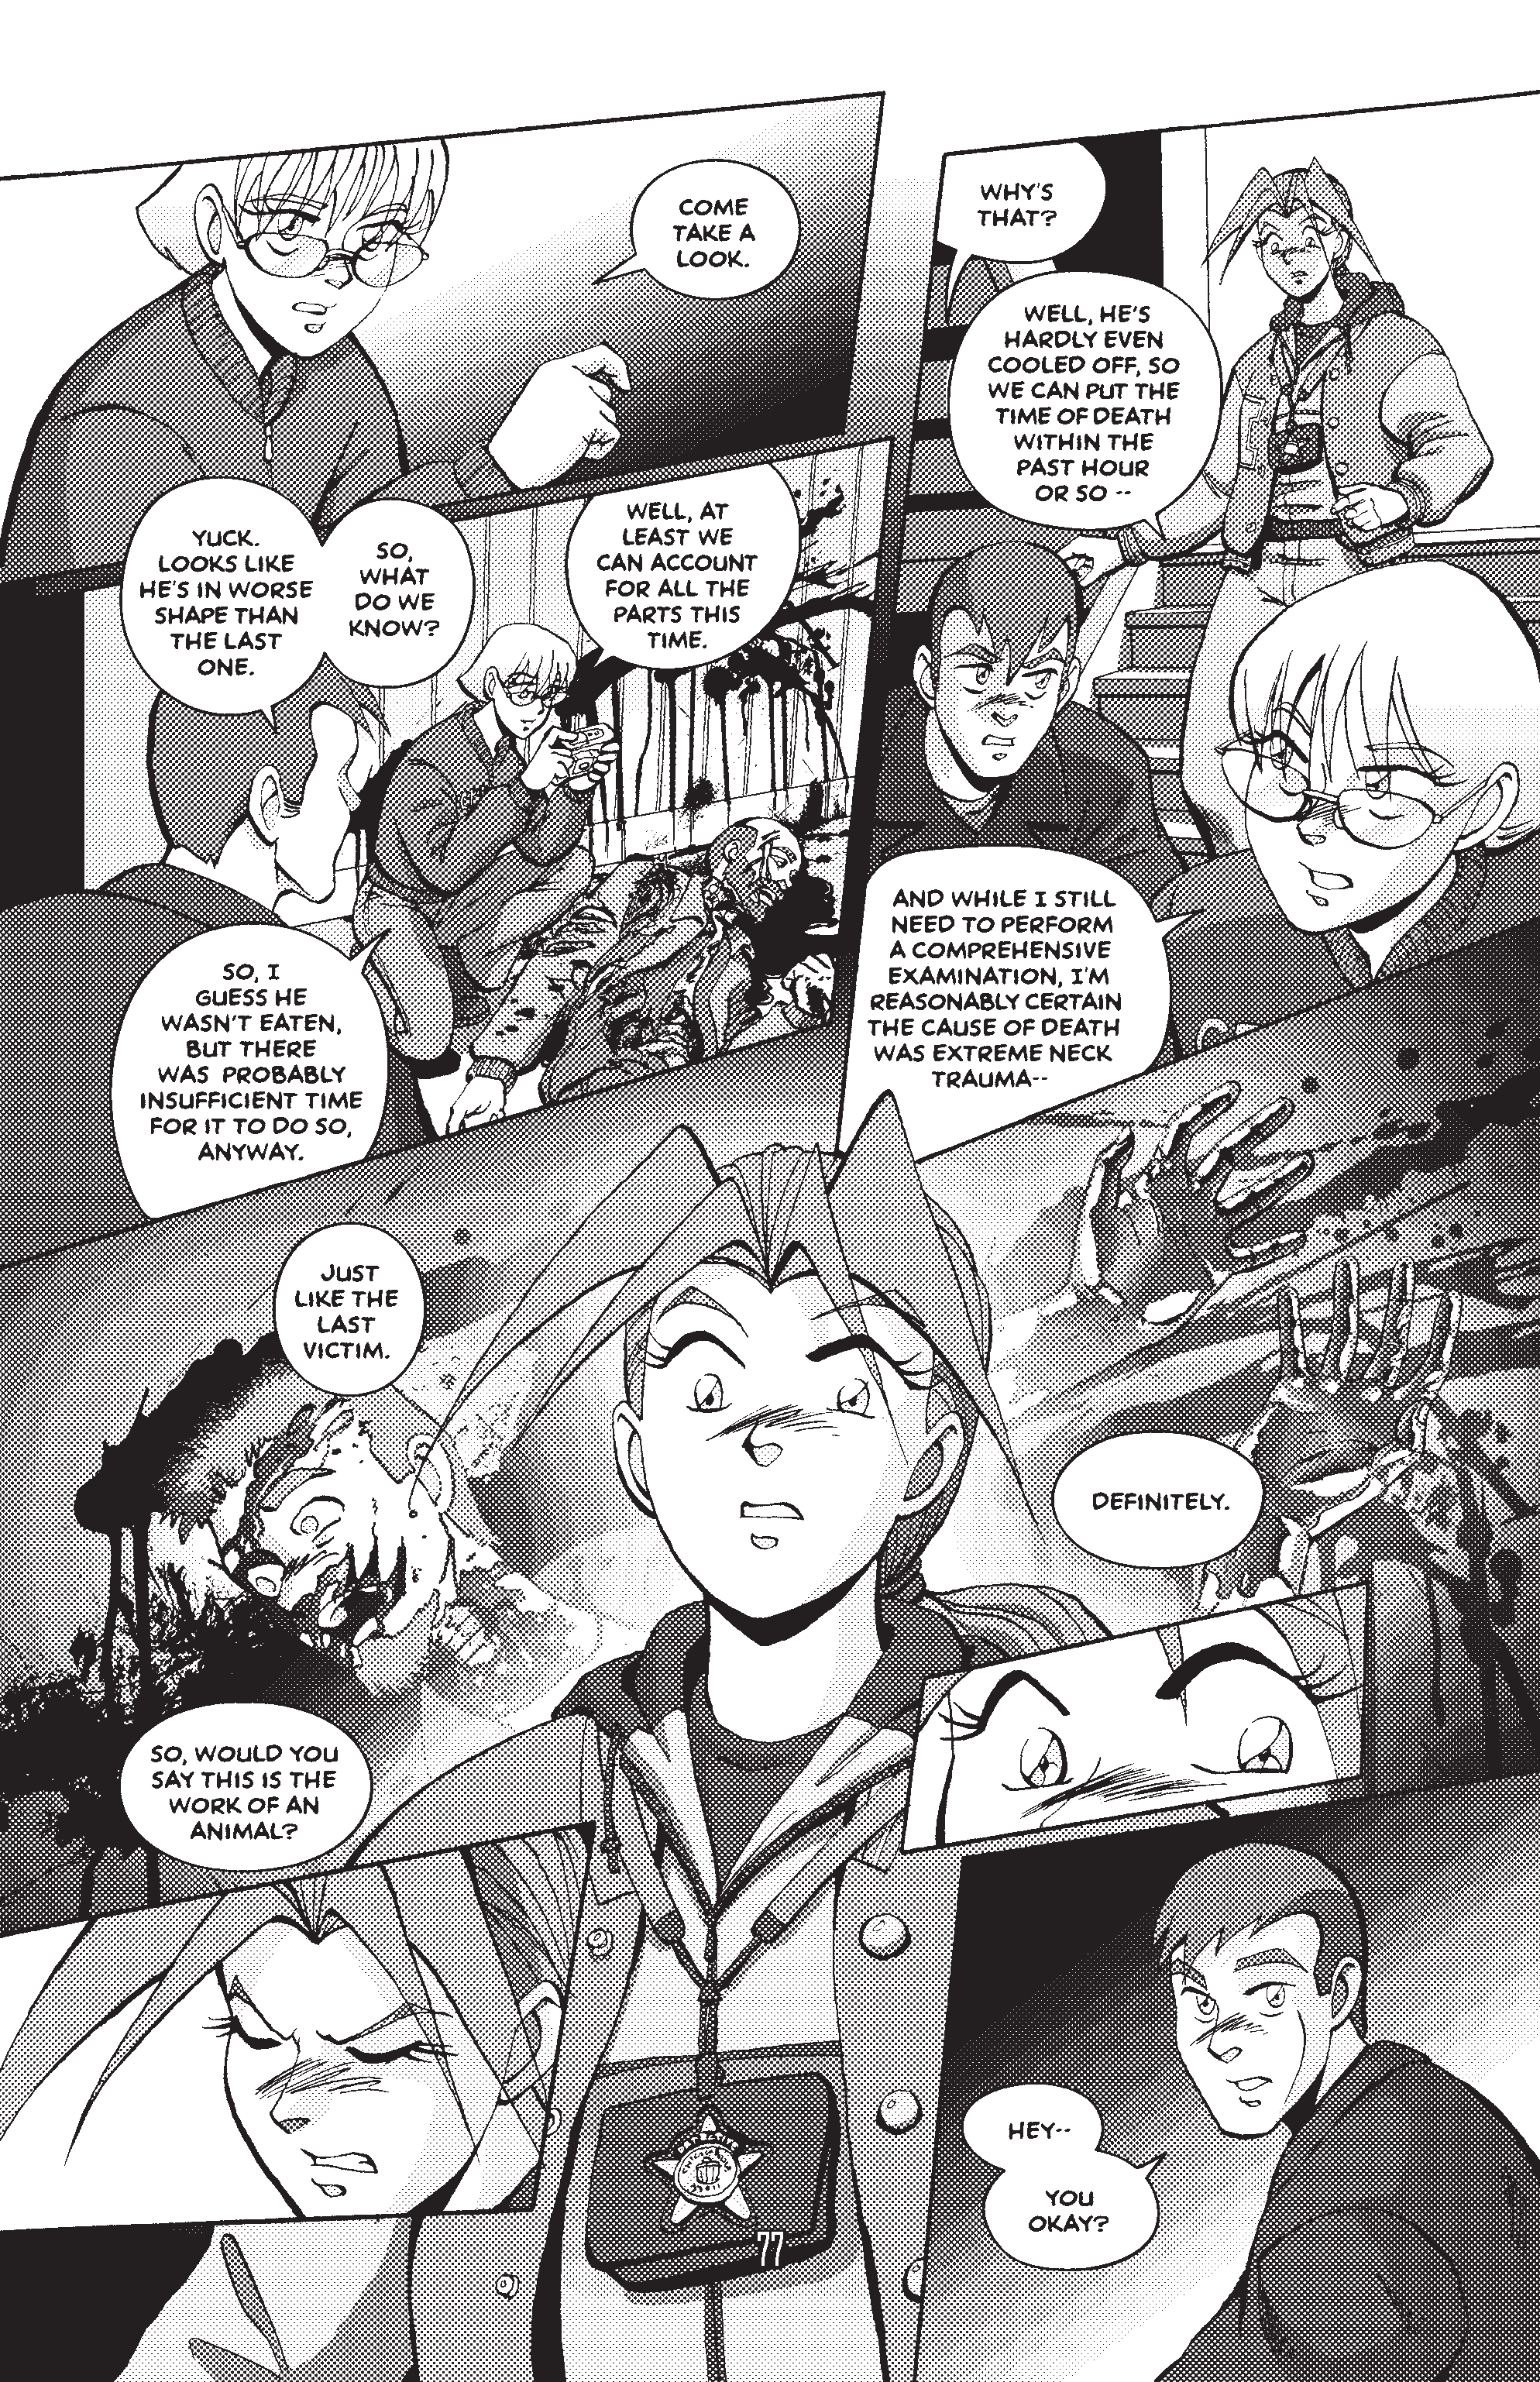
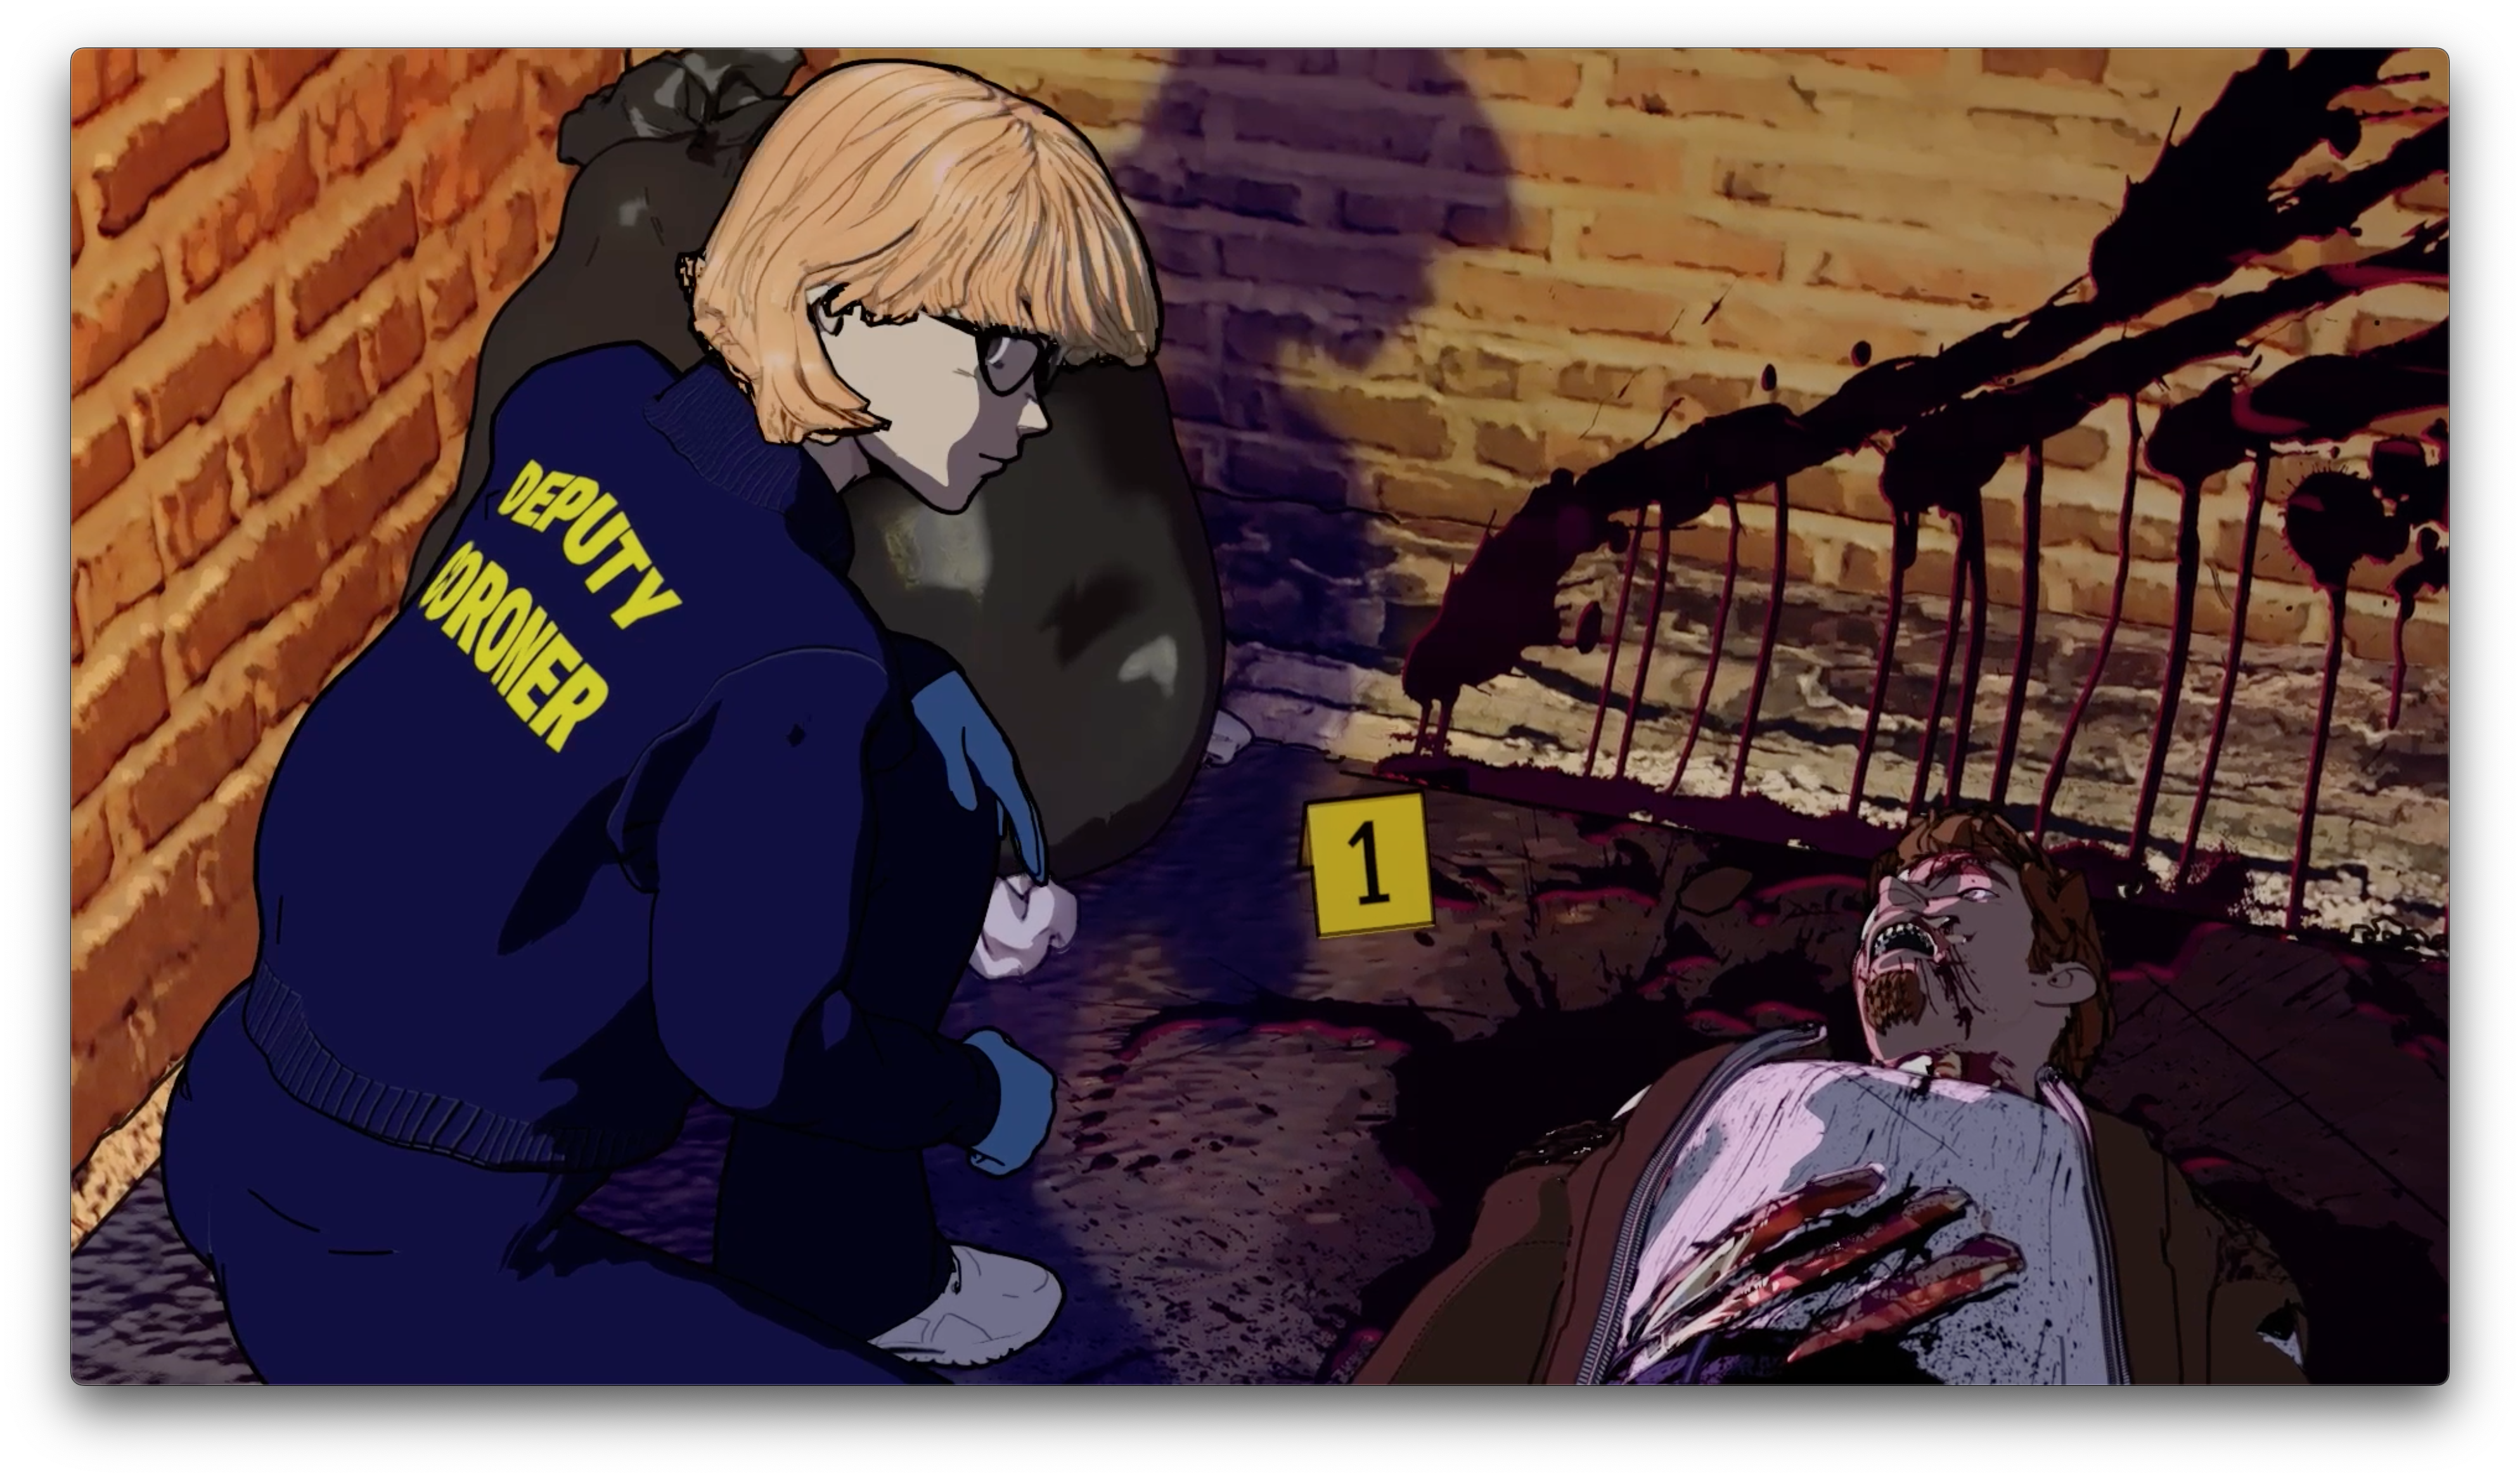
Conversely, the opening scene where they find the body was actually the last scene I animate, since it was easily the most complicated. Originally, I was going to end the film with her finding the body and passing out. Here’s a couple of shots in the opening scene taken from the opening of Part Two: Agitation:
I had the idea for this animated werewolf transformation sequence way back while I was still working on PS Part Two: Agitation. I’d been dreaming about making an animated trailer for the series, and I knew this would be the thing that would cap it off. However, I had no practical way to try to do it, but it did serve as the inspiration for the cover for Part Three: Emergence. Later on, I also made a hand-painted version that ended up being the cover to the Volume 1 collection.
And here’s a couple of tests of the same animation from a couple of different angles. I thought they were pretty cool.
]]>0Dirk Tiede<![CDATA[The Origins of RESTLESS SLEEP]]>https://paradigmshiftmanga.com/?p=33902023-07-03T15:04:17Z2023-07-10T14:36:47ZWhy did I call the new filmRestless Sleep? As I’ve mentioned, I’ve wanted to animate Paradigm Shift for a very long time. A lot of this hinged around Kate’s fateful transformation into a werewolf.
The title of the new film—Restless Sleep—actually comes from a drawing in my sketchbook that I did way back in 2002. I imagined her tossing and turning in her sleep in the lead-up to transforming for the first time. You can see it right there in the upper left hand corner.
However, with the completion of Equilibrium and the launch of ModernTales.com, I got wrapped up with working on continuing the story instead of focusing on this side project. And so “Restless Sleep” got put in the drawer, and only existed as a series of pages in my sketchbook for 20 years.
Early transformation sketches from 2001 – Page 01
Early transformation sketches from 2001 – Page 02
Early transformation sketches from 2001 – Page 03
So, when I started playing with 3D last year, knowing that I wanted to animate Kate’s metamorphosis, this story immediately sprang to mind. The project started with a smaller scope—just animate the transformation and her going out the window into the night. And set it all to some music. But obviously I got a bit more ambitious, and it turned into the final film you see today!
]]>0Dirk Tiede<![CDATA[Presenting: “PARADIGM SHIFT—Restless Sleep”!]]>https://paradigmshiftmanga.com/?p=33762023-07-03T14:36:39Z2023-06-28T16:25:08ZPARADIGM SHIFT—Restless Sleep is now showing!
Based on the cult werewolf detective comic seriesPARADIGM SHIFT, classic werewolf tale meets paranormal mystery in this new animated short!
Detective Kate McAllister is in for a rough night. While investigating a strange murder, she discovers she has a connection to the killer that is stronger than she could possibly imagine!
PARADIGM SHIFT—Restless Sleep is my first animated film. It as was created in Blender with characters rigged using DAZ Studio’s Genesis 8 platform. Composited in Adobe After Effects and edited in Adobe Premiere. I also composed and performed the music using Apple’s Logic Pro. The whole project took me just over a year to complete.
]]>0Dirk Tiede<![CDATA[Animating Kate in Blender]]>https://paradigmshiftmanga.com/?p=33262023-06-23T17:53:43Z2023-06-20T14:21:04Z
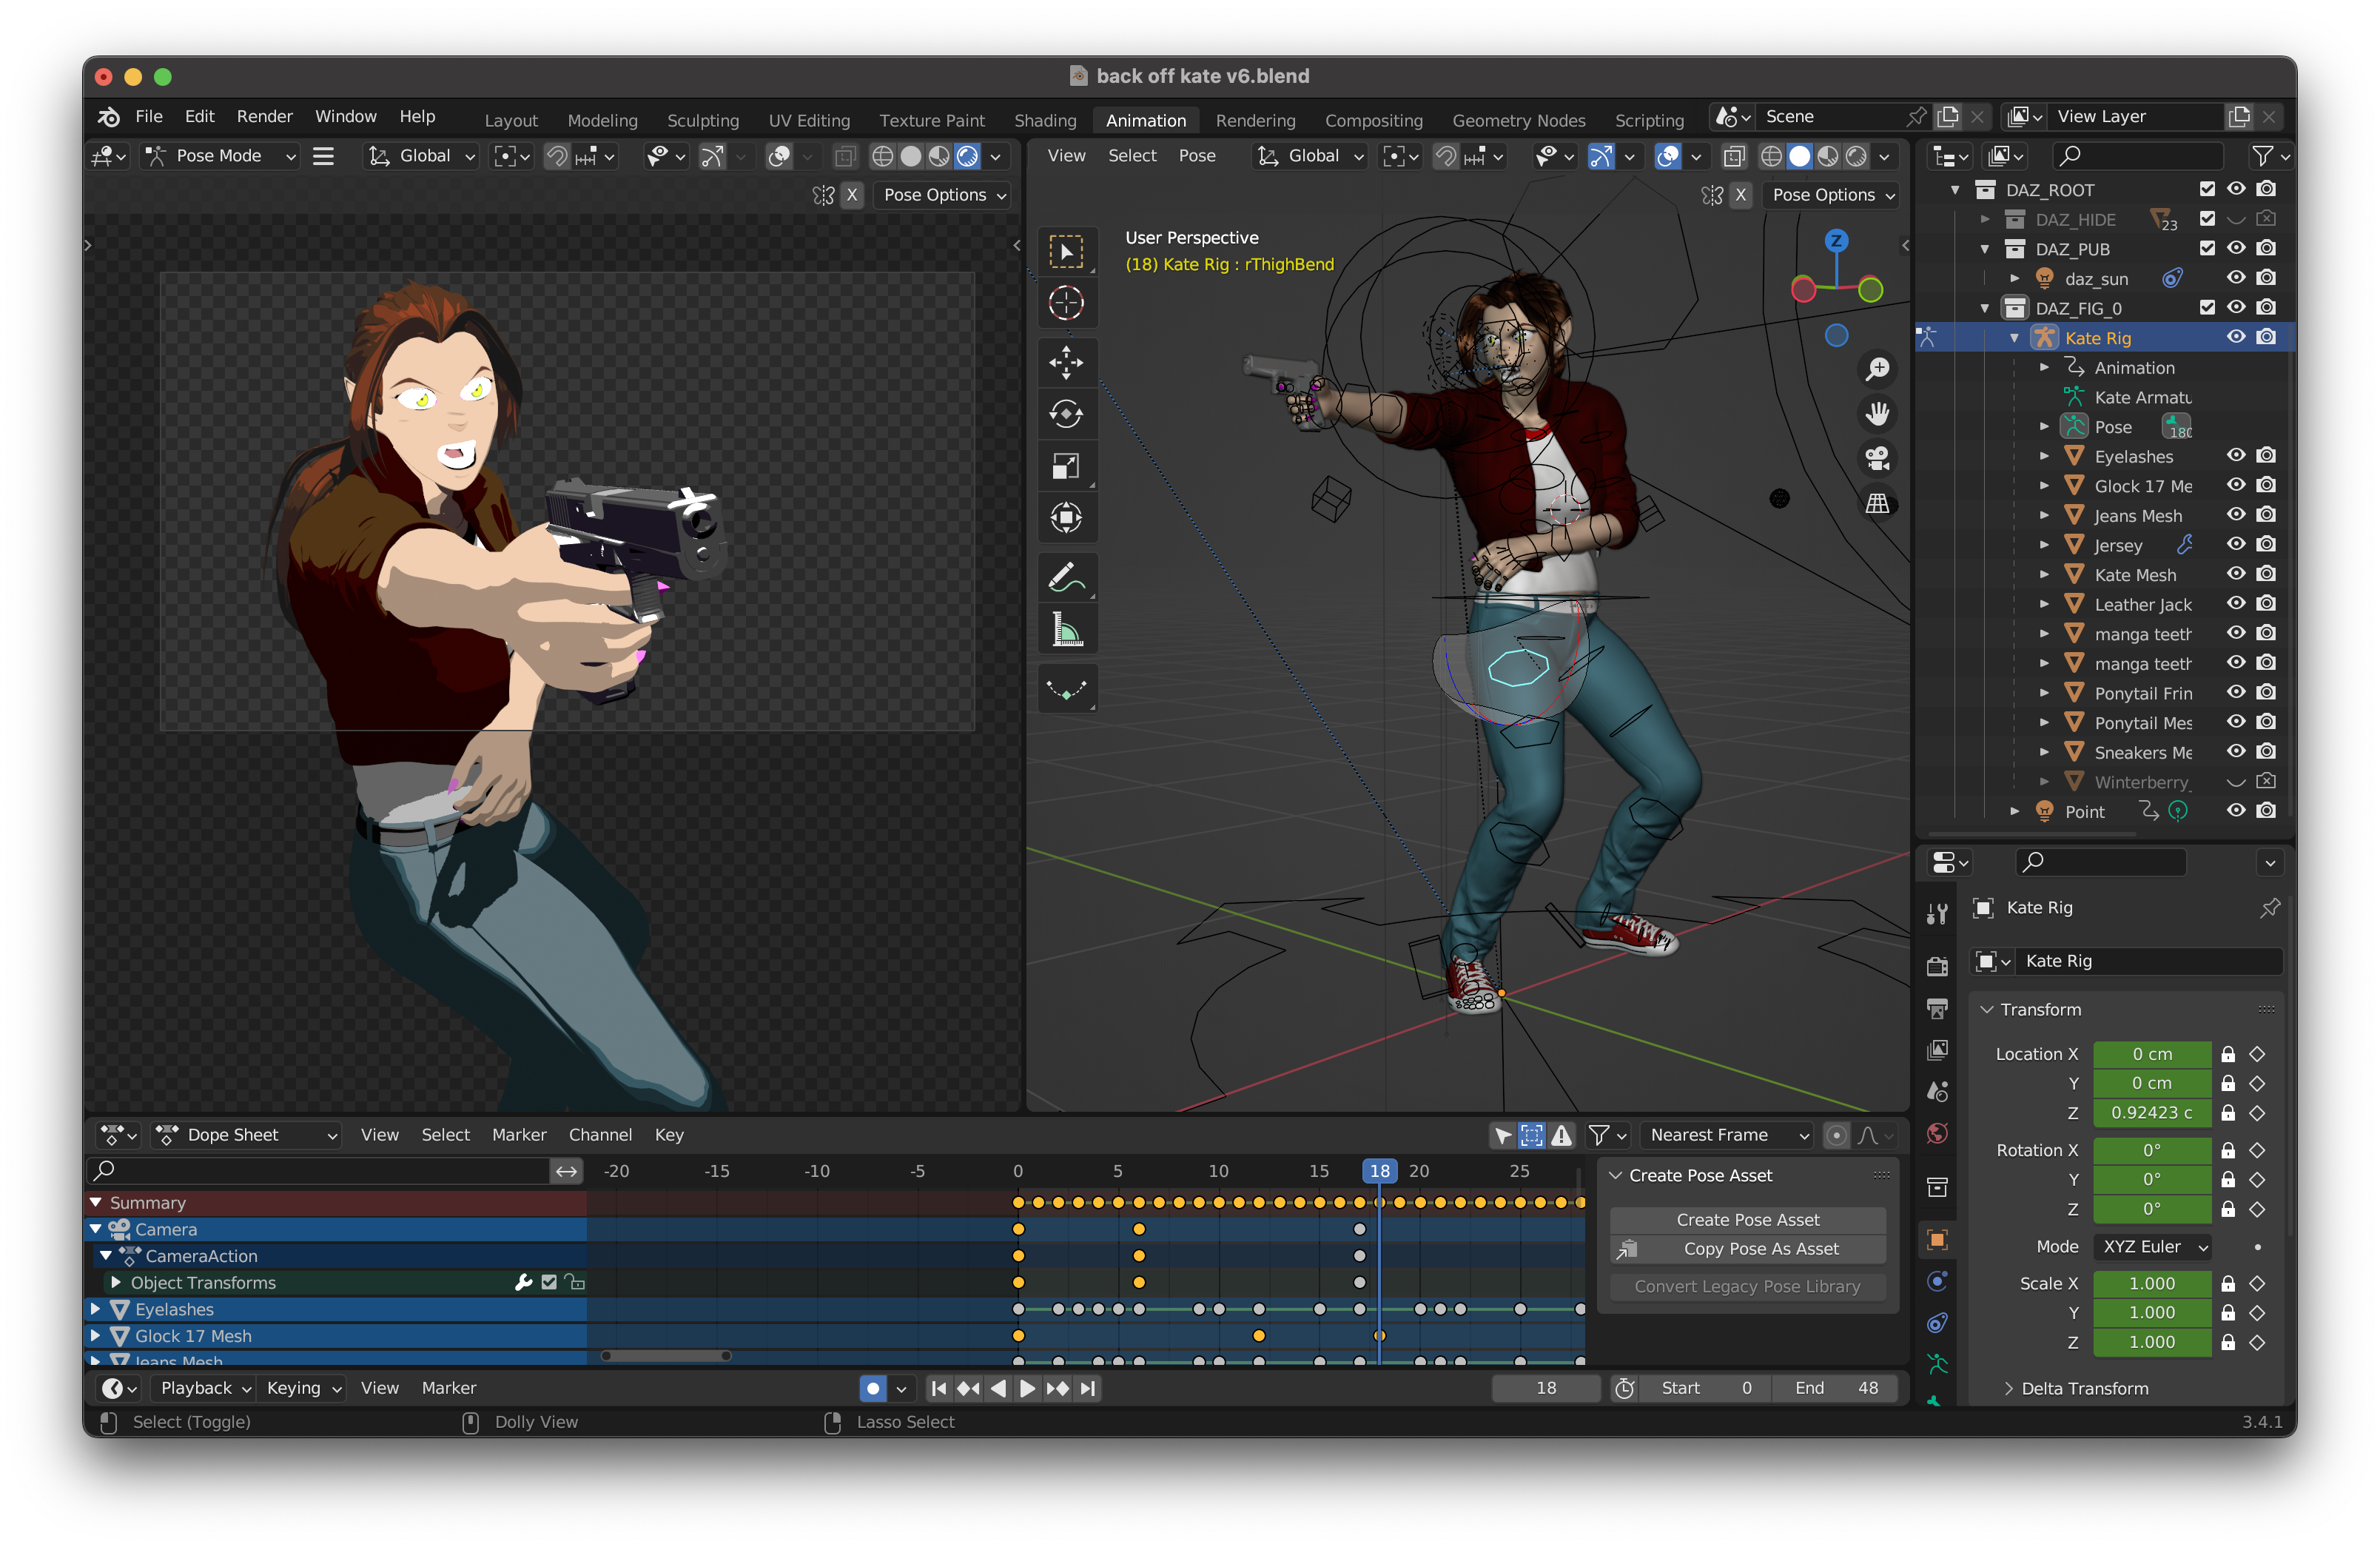
Here’s a quick peek at what it’s like to work on this project inside of Blender3D.
One of the things that made Restless Sleep possible was the ability to preview the final look in real time, thanks to Blender’s EEVEE engine (and some beefy GPU hardware.) This minimized the amount of time I needed to spend creating test renders and allowed me to make artistic decisions on the fly.
Animating Kate herself involved something called a character “rig” or “armature”. This was the most time-consuming thing to create in the entire project, since it had to transform into her werewolf form. It consists of several different parts, starting with the 3D objects or “meshes” that create the basic shape of the character. In Kate’s case, she’s made up of five basic objects: her body (the most complex and detailed of all the meshes), her hair, her upper and lower teeth (which are separate objects for reasons), her eyelashes (also separate for reasons). There are clothing objects as well which change from scene to scene.
Next, is an object made up of what are called “bones”. These are the literal controllers that move the objects. Each bone corresponds to some of the polygons that make up each object’s mesh, and therefore allow the character to be posed and moved around. Luckily this process was mostly automated for me, since I used the Genesis 8 character base from DAZ Studio.
All I had to do was modify the existing model to match Kate’s character design. However, for the hair, I was on my own. I learned how to “rig” with her hair.
First, I created a chain of bones for each section of her hair I wanted to animate—bangs, front, back, left, right and center.
Next, I had to “weight paint” the mesh so each bone would affect a specific part of the hair. Below is an example of the “heat map” of part of her bangs that corresponds to the bone directly underneath it. The blue represents area where the bone has no effect at all, with colors transitioning from green to yellow to red for areas where the bone has the most effect. While this can be done automatically, I ended up “painting” each strand by hand to get the smoothest results when her hair moves.
Lastly, I set up “IK chains” for each strand of hair, so I could control them by moving a target object around. “IK” stands for “Inverse Kinematics”, which is the method 3D programs use to move bones so they rotate as a group to point to a specific target. The round balls in the rig are the targets for each part of the hair. Here’s how it looks in practice
The final step is textures! Since I want to mimic the look of classic hand-drawn animation, that meant two things: cel shading and outlines. I achieved the first through tweaking the materials. Mainly, I tell Blender to do a hard cutoff between the light and dark areas of the figure, which creates the “cel-shaded” look. The shadows are then applied in a way that darkens the image map on the figure, in this case using a dark blue, which matches the shadow color in the rest of the set. Unfortunately, I had to set this manually for every new scene if the shadow colors change. For instance, the shadows in the night scenes are a deep blue, while those in the daylight shots are different. I had to implement this for every material on every object I wanted to be cel shaded. Kate’s body alone has over a dozen materials, but most of the other objects only have one or two. Thankfully, once I had one I liked, I could just copy and paste the settings into the others.
The second thing that needed to happen to perfect the look was the outlines. There are two ways to achieve this in Blender. The first one I used is called “Freestyle”, which draws outlines over the model during the rendering process. It achieves a nice, consistent look, but the downside is it’s very slow, taking sometimes over 5 minutes per frame to calculate. However, since it could only use one processor core at a time, it meant I could do other things on my computer while it rendered in the background. I rendered about half of the film using Freestyle.
The second method involves using a 3D object called “Grease Pencil” which actually creates a the outlines as an object in front of the camera when paired with a modifier called “Line Art”. Grease Pencil lines also have a number of significant advantages. First, they render very quickly. Second, they can calculate were objects intersect and draw line there. Third, they can be previewed right in the Blender workspace. The only real downside is that they have to be “baked” or pre-calculated into the scene before you can render them as a separate output layer (to be composited later), so there a few hoops you have to jump through before the scene is ready to render. Also, I didn’t discover how to use them until I was over halfway through the film, so in order to use it, I had to rework the scene, which was okay since I ended up doing that for a good chunk of the film anyway. The only other downside was that the Grease Pencils engine treated the eyes and eyelashes differently than Freestyle, so they required more touchup in the compositing stage, which was also a little annoying. But overall they were definitely worth the trouble!
Once Kate was fully set up, I could begin animating her! After creating the test transformations, I created a test scene to see how I could integrate her into an actual 3D set and animate her in a way that would be convincing, if not realistic. I chose a set I had originally created in SketchUp for the comic—her bedroom. After importing the objects into Blender, I fleshed out the room to match the comic a little more closely, including learning how to create cloth simulations to create the drapes, pillows, and sheets on bed. Here’s a quick look at the finished set:
And here’s what it looks like when the lights go off (or rather “on” since this was the actual lighting for the set.)
From this experiment, I learned the basics of posing and timing needed to create an animation. I also learned I needed to light the background and the characters separately, since the lighting that worked one didn’t always work for the other. I also figured out how to move the camera between frames so I could string several shots into a single scene. Here’s what the full test looked like:
After creating this, I knew had the tools I needed to tackle a full animated short.
]]>0Dirk Tiede<![CDATA[Restless Sleep animated short film premieres June 27th!]]>https://paradigmshiftmanga.com/?p=33082023-06-26T21:57:45Z2023-06-01T20:23:49ZBack Beat Brewing here in Beverly, MA at 7pm EST on Tuesday June 27th!]]>Save the date!
I’m proud to announce that I finally have a release date for Restless Sleep! I’m hosting a local premiere at Back Beat Brewing here in Beverly, MA at 7pm EST on Tuesday June 27th!
WHAT: PARADIGM SHIFT—Restless Sleep WORLD PREMIERE!
In addition to the film showing, I’ll be doing live, behind the scenes demos on how I made the movie, along with a Q&A. I’ll also have books and prints in tow for a signing. Plus there will be excellent beer on tap! Back Beat specializes in English-style bitters and cask ales. I’m a huge fan!
Film will post to YouTube @ 7:30pm!
But if you can’t join us that night, I’ll be live-streaming the event on my YouTube channel, too. The film will drop at the same time we show it in person, and you can join in the demos and Q&A afterwards!
Watch the trailer here:
]]>0Dirk Tiede<![CDATA[How do you build a city from SCRATCH?]]>https://paradigmshiftmanga.com/?p=32512023-05-24T01:54:51Z2023-05-23T20:09:50ZOne block at a time.
Chicago has always been a character on its own in Paradigm Shift. So, when I embarked on creating an animated version of PS, it meant I needed to bring the Windy City to life as well!!
I started with Kate’s apartment building. Using photos I had taken as reference, I modeled the architecture by hand, and then used my photos for the textures and materials.
Next, I needed to create a version of the back alley where poor James Wilson meets his untimely end. Using a model of the El tracks I modeled while creating the cover to The Art of Paradigm Shift, I built up a street scene based on the backgrounds in the opening scene. To create the buildings, I created modular sections of walls with various windows, doors, and brick colors which I then copied and pasted in various patterns to quickly build up the street. I then added various details to the buildings that would be closest to the camera. The cars are free models downloaded from SketchUp’s 3D Warehouse.
Lastly, I needed to create a 3D version of the Chicago skyline. To achieve this, I ended up using something called “procedural” buildings, which were automatically generated using a set of modular building pieces, kinda like LEGO bricks. Thanks to a tutorial by Kammerbild on YouTube, I developed a customized engine that could quickly generate new buildings of any size by plugging in the height, width, and depth, and customize the look by swapping out vertical and horizontal stripes. I can even turn the lights on and off at random. By using a couple of different sets of pieces, I could build up the entire skyline and have enough variation to create a useable matte painting that I then pasted into the background of my sets.
]]>0Dirk Tiede<![CDATA[How to make a werewolf]]>https://paradigmshiftmanga.com/?p=32282023-05-24T01:54:51Z2023-05-03T18:42:08ZCurious about how I created the animation of Kate’s werewolf transformation? I’ve made a video that goes over the process I used to make it happen!
If you’re still curious about some of the technical details, and want to learn how to do something like this yourself, here’s some links to the tutorials I used:
First off, I used DAZ Studio’sGenesis 8 Female model as a starting point for Kate. Let me underscore that I did *not* model this starting figure. DAZ’s amazing artists did all the heavy lifting by creating that model. Since I had no idea how to create my own character rigs when I started this project, using a pre-rigged figure like Genesis 8 was a logical starting point. What I did need to learn was how to create “morphs” in Blender that could be used on the model.
Of course, this meant learning to edit the model in Blender. Now, in this case, I wasn’t starting from scratch. I’m an experienced 3D modeler, and have been working in 3D on and off for over 25 years—just mostly to create sets and architectural models. Character modeling is new to me, and I did have to learn Blender’s interface. This tutorial series from Blender Guru is the one I used to teach me the basics of using Blender’s modeling interface:
The key to making the transformations was to make sure all the parts of the model lined up up between forms. For instance, the polygons that made up the nose in the human model had to directly correspond to the polygons that would become the snout. In this case, it was my knowledge of anatomy that was the key skill. Whether you’re learning to draw or learning to model in 3D, there’s no substitute to learning the basics of human—and in this case, canine—anatomy. I had already thought through all this long ago when I designed Kate’s transformation for the comic:
If you want to see more the design of the werewolf transformation, you can find ALL of the sketches, sequences, and details in my art book, The Art of Paradigm Shift. You’ll also find tons of art, sketches, and tutorials in there, too!
Editing the textures for the Genesis 8 model was pretty easy. I just had to find the location of the original image files for the model in my DAZ library, copy them over to a new folder, and then create new ones in Photoshop. It also helped to have the UV Map templates that came with the model for free (downloadable for free from DAZ from your account’s asset library), which I used as a guide to draw and paint the new texture maps. Child’s play in comparison to drawing comics!
If you want to learn how to edit your own textures in DAZ or Blender using Photoshop or another image editor, check out this tutorial from rdaughterDAZ : https://www.youtube.com/watch?v=bmbO0zoypJA
Download the UV Map templates here:
(This link only works if you have an active DAZ account.)
If you want to learn how to export a finished character out of DAZ Studio into Blender, I recommend using the DAZ to Blender Bridge. It’s pretty powerful, and will even export out all the morphs and modifiers that will keep the figure’s shape while moving. It even creates a rudimentary rig you can use to animate. It’s not as versatile as Blender’s built in Rigify armature, though. I recently found a great add-on called Rig GNS from 22722 Studios that will convert DAZ to Blender’s default armature to a Rigify one, though. It’s a paid add-on but worth the price in the amount of headaches it saves! I’ll definitely be using this as I move forward with new animation projects.
But this series called “Introduction to Rigging” on the Blender Studio site (requires a subscription, sorry) is the crash course I used to do a deeper dive on how rigging works. Don’t worry, though! You don’t need to be an expert rigger to start out!
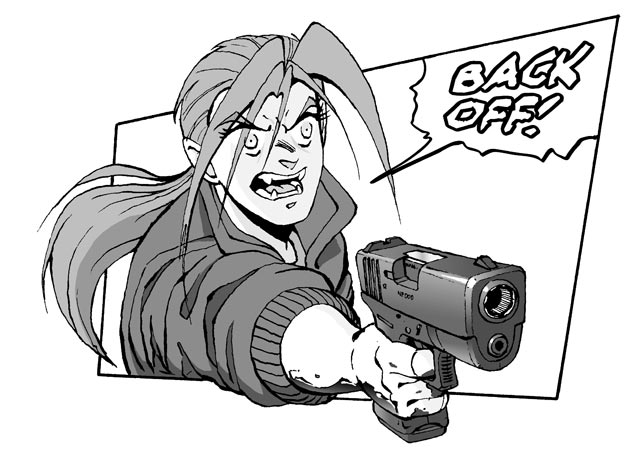
]]>0Dirk Tiede<![CDATA[Bringing Kate to Life!]]>https://paradigmshiftmanga.com/?p=31902023-05-24T01:54:51Z2023-04-26T16:35:53ZSo, how do you go from this…
To THIS?
The first full test animation of Kate using Blender. This was a “proof of concept” that showed me that making an “anime” version of Kate was entirely possible!
The answer is 3D. While I would dearly love to see Paradigm Shift animated in a traditional hand-drawn style, the truth is that it is far too labor-intensive for me to do by myself. Perhaps one day I will be lucky enough to work with a studio full of professional animators to bring that dream to life, but in the meantime I’m relying on a tool that is much more accessible to me: the amazingly powerful, FREEl open source animation program BLENDER.
The trick was creating a version of Kate that could actually be animated in the first place. Creating and “rigging” a 3D character is really complex process. And frankly, it’s still not one that I could do from scratch. Thankfully, this is 2023, and there are a TON of resources out there for someone who’s just starting out.
In this case, I turned to another free program DAZ Studio, which has been offering fully rigged 3D human characters for FREE for over a decade. I ended up modifying one of their Genesis 8 Female models to create Kate. But it was a fairly long learning process. In fact, I when I first started out, all I wanted to do was see if I could make a more “human” version of Kate that would be able to transform into her werewolf form.
DAZ3D’s Genesis 8 Female—This is the model I started with. I learned how to export this base mesh out into Blender. After making changes, I’d then import them back into DAZ to test them out on the rigged model.
Modeling the werewolf form in Blender—I had modify the mesh by pushing the individual points around to create new shapes. The trick was I couldn’t add any vertex points to the model, so it would become a clean “morph” back in DAZ Studio.
(RAR.)
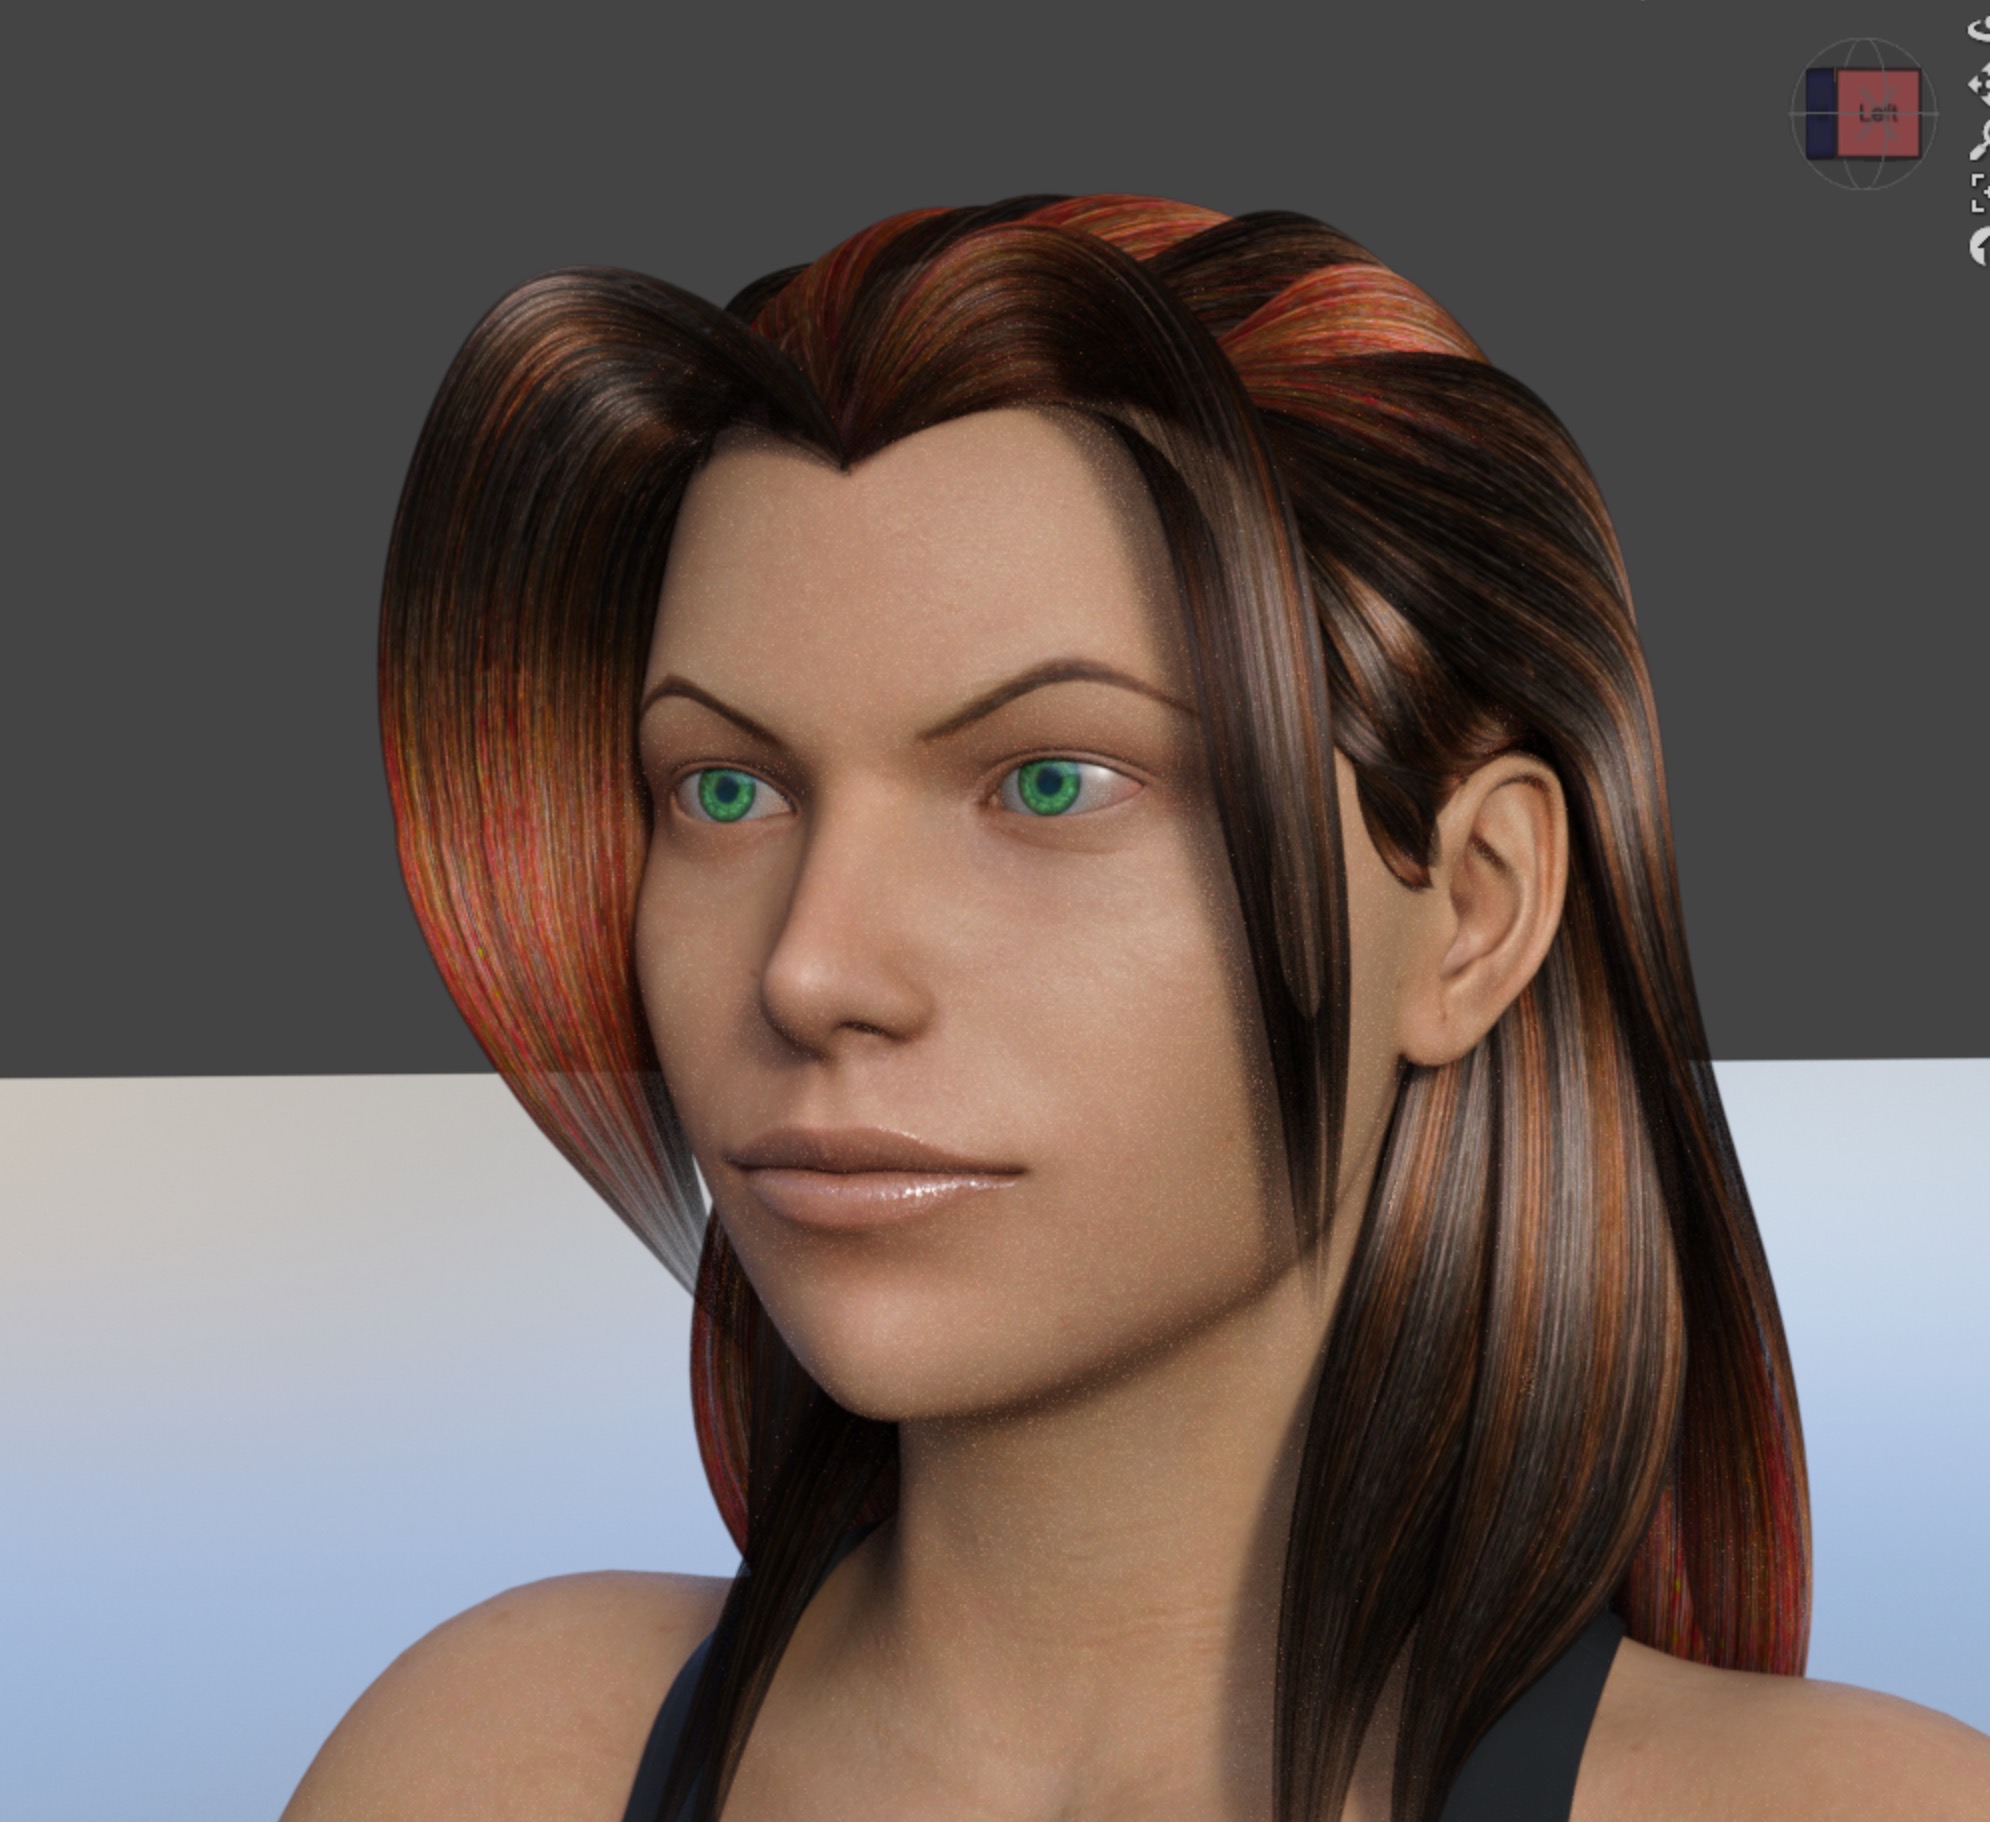
Once I had a working werewolf transformation up and running in DAZ, the next step was to figure out how to make Kate look more like an anime character. I started by looking (and purchasing) a few anime-esque character mods for the Genesis 8 model, then it was back to Blender to fine tune them into a recognizable version of Kate.
“Human Kate” test in DAZ Studio Partially inspired by playing games like Shadow of the Tomb Raider and Horizon Zero Dawn, I wanted to see what Kate would look like in a more realistic form when I first started this process. But ultimately, I decided making an anime version that was more true to the comic would be more fun.
Early “Anime Kate” test in DAZ Studio This was using a character called “Catara” give Kate bigger eyes and more seed-shaped anime head. This was about 35% of “Catara” head shape on the morphing slider.
Modeling Kate’s head in Blender. In addition to sculpting Kate’s anime face and werewolf form out of the Genesis 8 model, I also had to learn how to model her hair!
This whole process took about two months. I spent the first month or so figuring out how to get the transformable version working in DAZ Studio, then another week or so to make the “anime” version. Then once I got her moved over to Blender using the DAZ to Blender Bridge, it was a couple of weeks to create these test animations.
]]>0Dirk Tiede<![CDATA[I’m working on a PS MOVIE!]]>https://paradigmshiftmanga.com/?p=31792023-05-24T01:54:51Z2023-04-20T14:21:27ZI’m making the very first Paradigm Shift animated short! Go ahead. Watch the trailer. I’ll wait.
I’m calling it Restless Sleep, and I can’t begin to tell you how thrilled I am to be working on it! I love comics, but I can now tell you that I love making animation even more. This project has me firing on all cylinders in the best possible way by bringing all the skillsets I have to bear on it—writing, design, illustration, 3D, computer & programming skills, video editing, and music!
Bringing my characters to life through animation has been a lifelong dream, and now I have the time and technology to actually do it! It all started when I started poking around with Blender during a fit of writer’s block, and with the help from free and paid models from DAZ Studio, before I knew it, I had a fully posable and transformable version of Kate, just begging to be brought to life! And even better, using Blender’s powerful shader engine I could make her look like an actual cel-shaded cartoon.
It’s about 7 minutes long, including a werewolf transformation sequence I’ve always wanted to see animated. I’m currently in the final stages of post-production on the film. I’m hoping to have it finished and ready to release this summer. Where and when are still up in the air, but there will be an online release at the very least.
In the coming weeks and months I plan to give you some behind the scenes looks into the creative process behind bringing Kate and friends to the screen!